
Run the Web Console on a Server
Host the XHack Agent on a VPS and use it from your phone or laptop. Create your login, start the console, keep it running, and reach it safely over a tunnel.
Run the Web Console on a Server
Host the Agent on a server and it stops being tied to your laptop. Start a long engagement from your phone, lock the screen, get on with your day, and come back to a run that is still going with the whole transcript waiting for you.
About ten minutes, start to finish.
Read this before you begin
The Agent is an offensive security tool, and this puts it on a machine the outside world can reach. Treat that seriously.
Once the console is up, anyone who gets past the login can run commands on that server. So the whole game is keeping the login shut and the blast radius small.
- Run it at your own risk. Only ever point it at targets you have written permission to test. You are responsible for everything it does.
- Use a spare, throwaway server. A container or a cheap VPS you can destroy afterwards. Never a machine that matters to you, and never one sitting beside production services, customer data or anything you cannot afford to lose. If the box is compromised, treat everything on it as gone.
- Keep it private. Leave it bound to
127.0.0.1and reach it over an SSH tunnel wherever you can. Only expose it publicly when you have to, and only behind HTTPS, as below. - Treat the login like a root password. Long, unique, and in a password manager, never reused.
- Rotate it, and rotate it often. Change the username and password every so often, and always after an engagement, after sharing the console with anyone, or if you even suspect the URL leaked. See Rotate the login.
- Tear it down when you are done. Stop the service, take the tunnel offline, and destroy the server. A console left running is a console someone else can find.
What you need
A Linux VPS you control, with SSH access. A small one is plenty.
A target you are authorised to test.
Nothing else. The console ships inside the Agent, so there is nothing to build.
A Linux VPS you control, with SSH access. A small one is plenty.
A target you are authorised to test.
Nothing else. The console ships inside the Agent, so there is nothing to build.
1. Deploy the Agent
SSH in and install the Agent the way you would on any machine, then confirm it is on your path:
xhack --version
Everything it stores, your login and its database, lives under ~/.xhack. Back up that folder and you have backed up your sessions and findings.
2. Create your login first
Do this before you start anything, so the console is never up without a credential in front of it:
xhack create-user --username you --password "a-long-passphrase"
Use a long, unique passphrase and save it to your password manager. This login is the one thing between the outside world and an agent that runs commands on this box.
If you ever lose it:
xhack reset-user
3. Start the console
xhack serve
That serves the console on 127.0.0.1:8765, reachable only from the server itself. That is the right default. It runs in the foreground, so closing the terminal or pressing Ctrl and C stops it. For anything longer than a quick look, keep it running as a service.
4. Keep it running as a service
For anything beyond a quick look, run the console as a user service so it starts on boot and restarts itself if it ever stops.
Install the service:
xhack serve --install-service
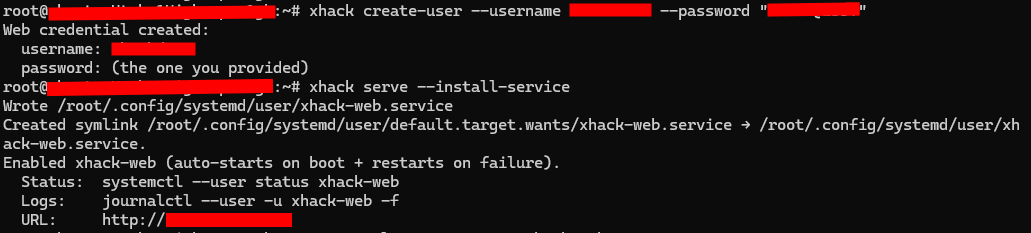
Point the service at the real binary (current release). The installer records a temporary path, so set the correct one before you rely on it. This is a one-time step for the current build; a future release records the path itself and you can skip it.
BIN=$(readlink -f "$(command -v xhack)")
sed -i "s|^ExecStart=.*|ExecStart=$BIN serve --host 127.0.0.1 --port 8765|" \
    ~/.config/systemd/user/xhack-web.service
systemctl --user daemon-reload
systemctl --user restart xhack-web
Verify it is up:
sleep 6
systemctl --user status xhack-web --no-pager
curl -si http://127.0.0.1:8765/ | head -1     # expect: HTTP/1.1 200 OK
No systemd? Keep it alive past your SSH session with nohup instead:
nohup xhack serve > ~/.xhack/logs/web.log 2>&1 &
Follow it with tail -f ~/.xhack/logs/web.log, and stop it later with kill "$(cat ~/.xhack/logs/web-server.pid)". nohup gives you no restart and no start on boot, so prefer the service for anything you rely on.
5. Reach it safely
The console is still bound to loopback, so nothing is exposed yet. That is on purpose. Pick one of these.
An SSH tunnel, the safest option
Nothing is published at all. From your own machine:
ssh -L 8765:127.0.0.1:8765 you@your-server
Leave it running and open http://127.0.0.1:8765. You are reaching the server through SSH, with no open port for anyone else to find. This is the recommended way to use it day to day.
A quick HTTPS tunnel, for a phone
To install the console as an app, a phone needs HTTPS. The simplest way is a tunnel that dials out from the server, so you never open a port or touch your firewall:
# Cloudflare Tunnel
cloudflared tunnel --url http://127.0.0.1:8765

# or ngrok
ngrok http 8765
Either one hands you a public HTTPS address in seconds.
Understand the trade-off. That address is on the public internet, and anyone who learns it can reach the sign-in page, with only your password in front. That is acceptable for a throwaway VPS and a strong passphrase, and it is the practical way to get the app onto a phone. Prefer cloudflared or ngrok over pointing a personal domain at the box: a domain ties the exposure to you and tends to outlive the engagement, while a tunnel URL is disposable and easy to kill. For anything sensitive, stay on the SSH tunnel instead.
If you do use a tunnel, add its own access control where you can. Cloudflare Access, for example, can require a login before a request ever reaches your server.
A public port, only if you must
If you genuinely need the console reachable on the server's own address, point the service at 0.0.0.0 and open the port. Do this only with a strong password, and ideally only behind HTTPS.
BIN=$(readlink -f "$(command -v xhack)")
sed -i "s|^ExecStart=.*|ExecStart=$BIN serve --host 0.0.0.0 --port 8765 --yes|" \
    ~/.config/systemd/user/xhack-web.service
systemctl --user daemon-reload && systemctl --user restart xhack-web
ufw allow 8765/tcp        # also open TCP 8765 in your VPS provider's firewall or security group
Then open http://YOUR_SERVER_IP:8765. The --yes is required on purpose: binding to anything other than loopback is a deliberate act, so the Agent makes you say it out loud. A bare public port has no TLS, which means your password crosses the internet in the clear, so put a reverse proxy or a tunnel in front of it before you use it for anything real.
6. Sign in and connect your key
Open the address and sign in with the login from step 2.
The first time in, the console asks for your XHack API key. Paste it, then Connect and continue. It is stored write-only in ~/.xhack/.env and never shown again, so the server can use it but nothing can read it back. Test connection confirms it works before you go on.
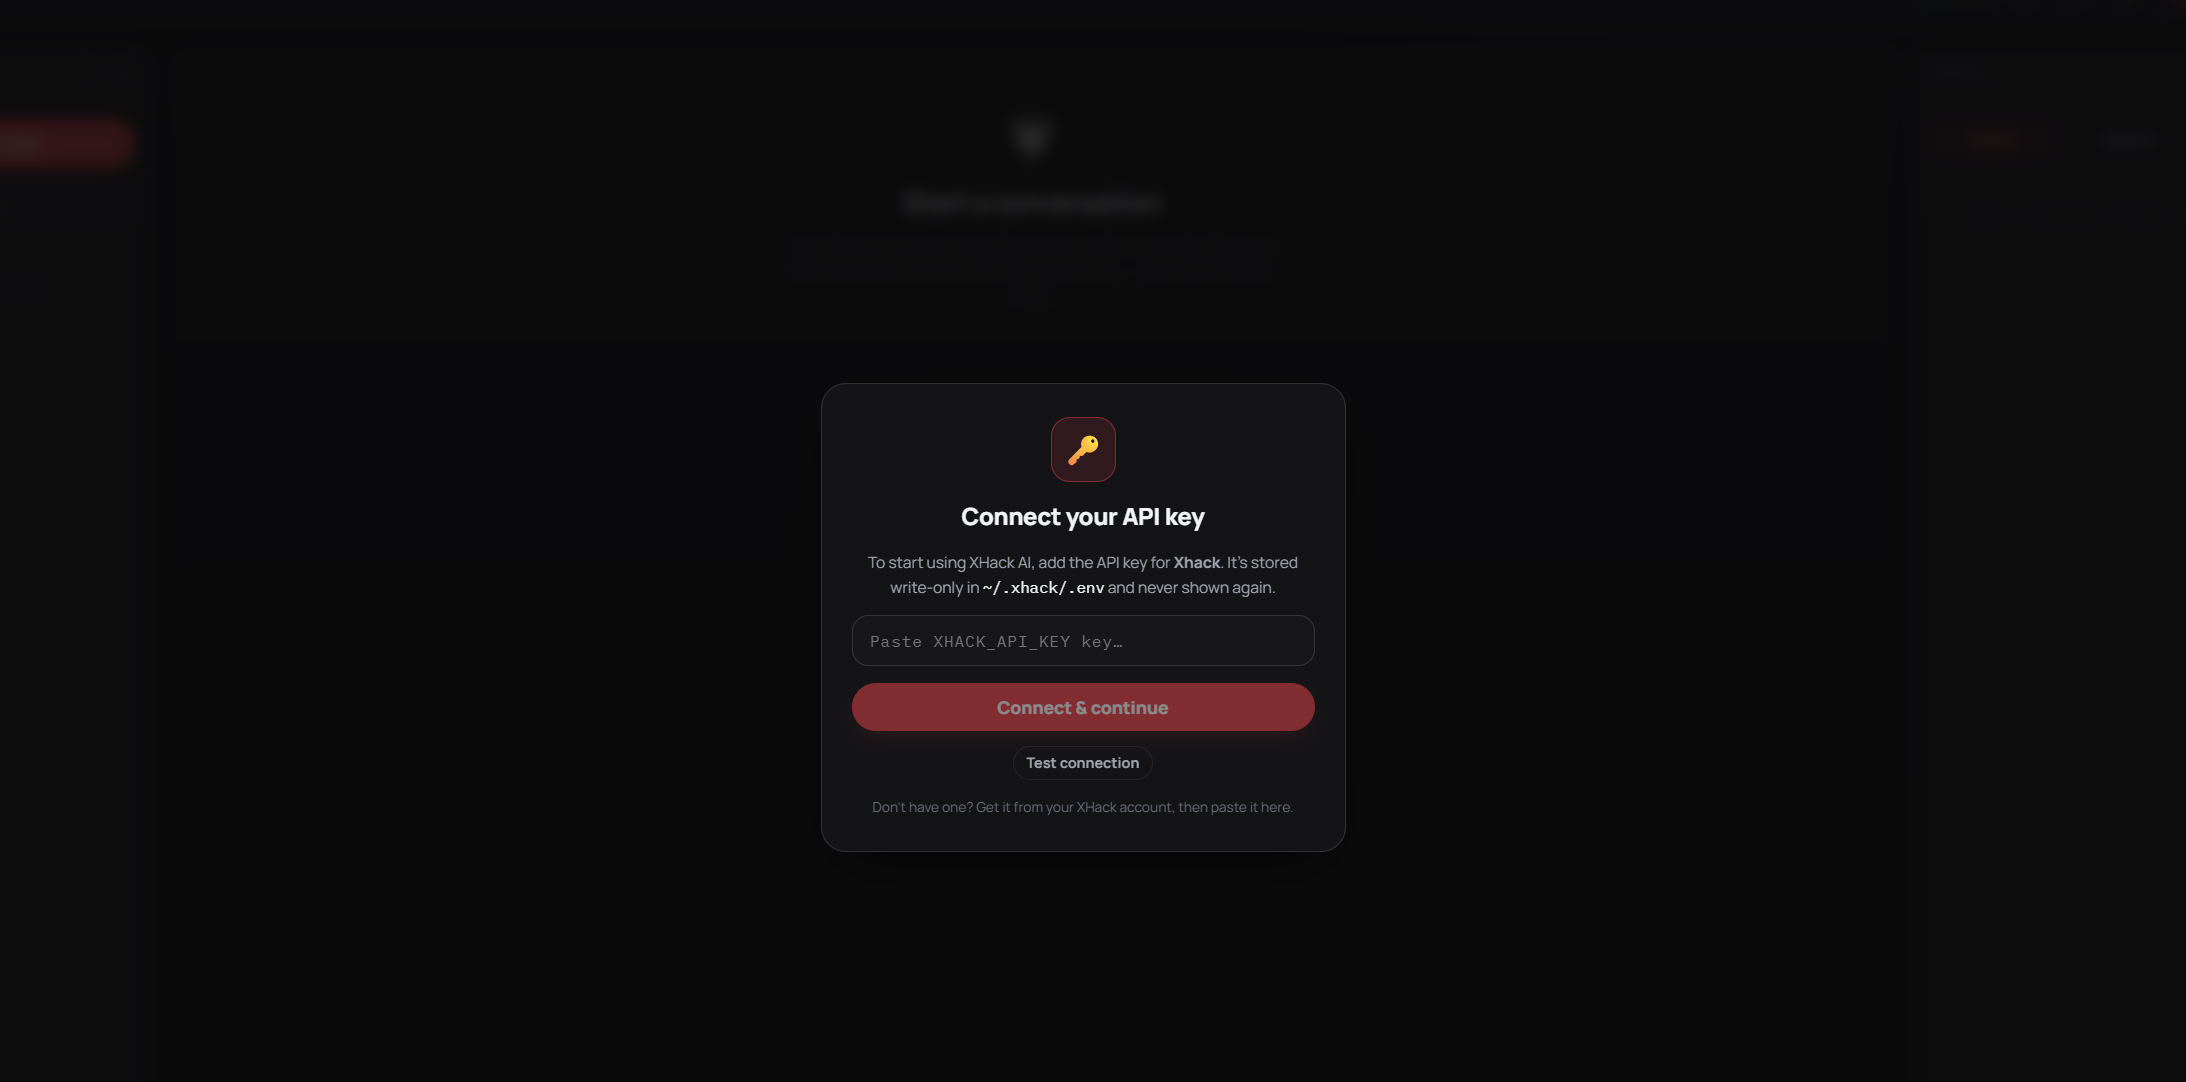
From here you have the full console: chat, findings, sub-agents, Repeater and autonomous runs. Now add it to your home screen so it behaves like a real app: Install the console as an app.
Managing the service
systemctl --user status  xhack-web     # check status
systemctl --user restart xhack-web     # restart
systemctl --user stop    xhack-web     # stop
systemctl --user start   xhack-web     # start
journalctl --user -u xhack-web -f      # live logs
If you want the service to keep running after you log out of SSH, enable lingering once with loginctl enable-linger "$USER".
Rotate the login
Change the username and password regularly, not just once. Do it on a schedule, and always after an engagement ends, after you have shared the console with anyone, or the moment you suspect the address has leaked.
Set a fresh username and password:
xhack create-user --username newname --password 'a-new-long-passphrase'
Or replace the credential outright if you have lost it:
xhack reset-user
Then cut off anyone who might still be signed in. In the console, open Settings, Web Access and use Sign out everywhere: it invalidates every active session instantly, on every device, so old logins stop working the moment the credential changes.
Keeping it locked down
- Rotate the login often. See Rotate the login above. A long-lived credential on a public box is the thing most likely to bite you.
- Read the audit log in Settings, Web Access now and then. Every login attempt is recorded, including the failures, so a burst of failures is your early warning.
- Sign out everywhere ends every active session at once, on every device. Use it after rotating the login, or the moment a phone goes missing.
- Keep the server patched, and take the tunnel down or stop the service when you are not using it.
- Destroy the server when the work is done. The safest console is one that no longer exists.
Related
- The Web Console, what it is and what is in it.
- Turn it on from the desktop app, if you are not using a server.
- Install the console as an app.
Try XHack AI Now
Experience the full power of XHack directly in your browser. No installation required.
Launch XHack AI