
GitGuard
Hands-on guide to GitGuard — connect a GitHub account, monitor repos, run manual scans, read findings, and act on PR comments.
GitGuard
GitGuard reviews every pull request your team opens for security issues and posts the findings as inline comments directly on the PR. This page walks you through connecting a repo and reading the results.
Step 1 — Connect your GitHub account
Click GitGuard in the main sidebar.
If you've never connected GitHub before, you'll see a centered card with a GitHub icon and the message "Connect GitHub to Get Started — GitGuard scans your pull requests for security vulnerabilities automatically..."
- Click Connect GitHub (red button with GitHub icon).
- You're redirected to GitHub's OAuth consent page.
- Pick the GitHub account or organization that owns the repos you want to monitor.
- Approve the requested permissions (read access to code, write access to PR comments).
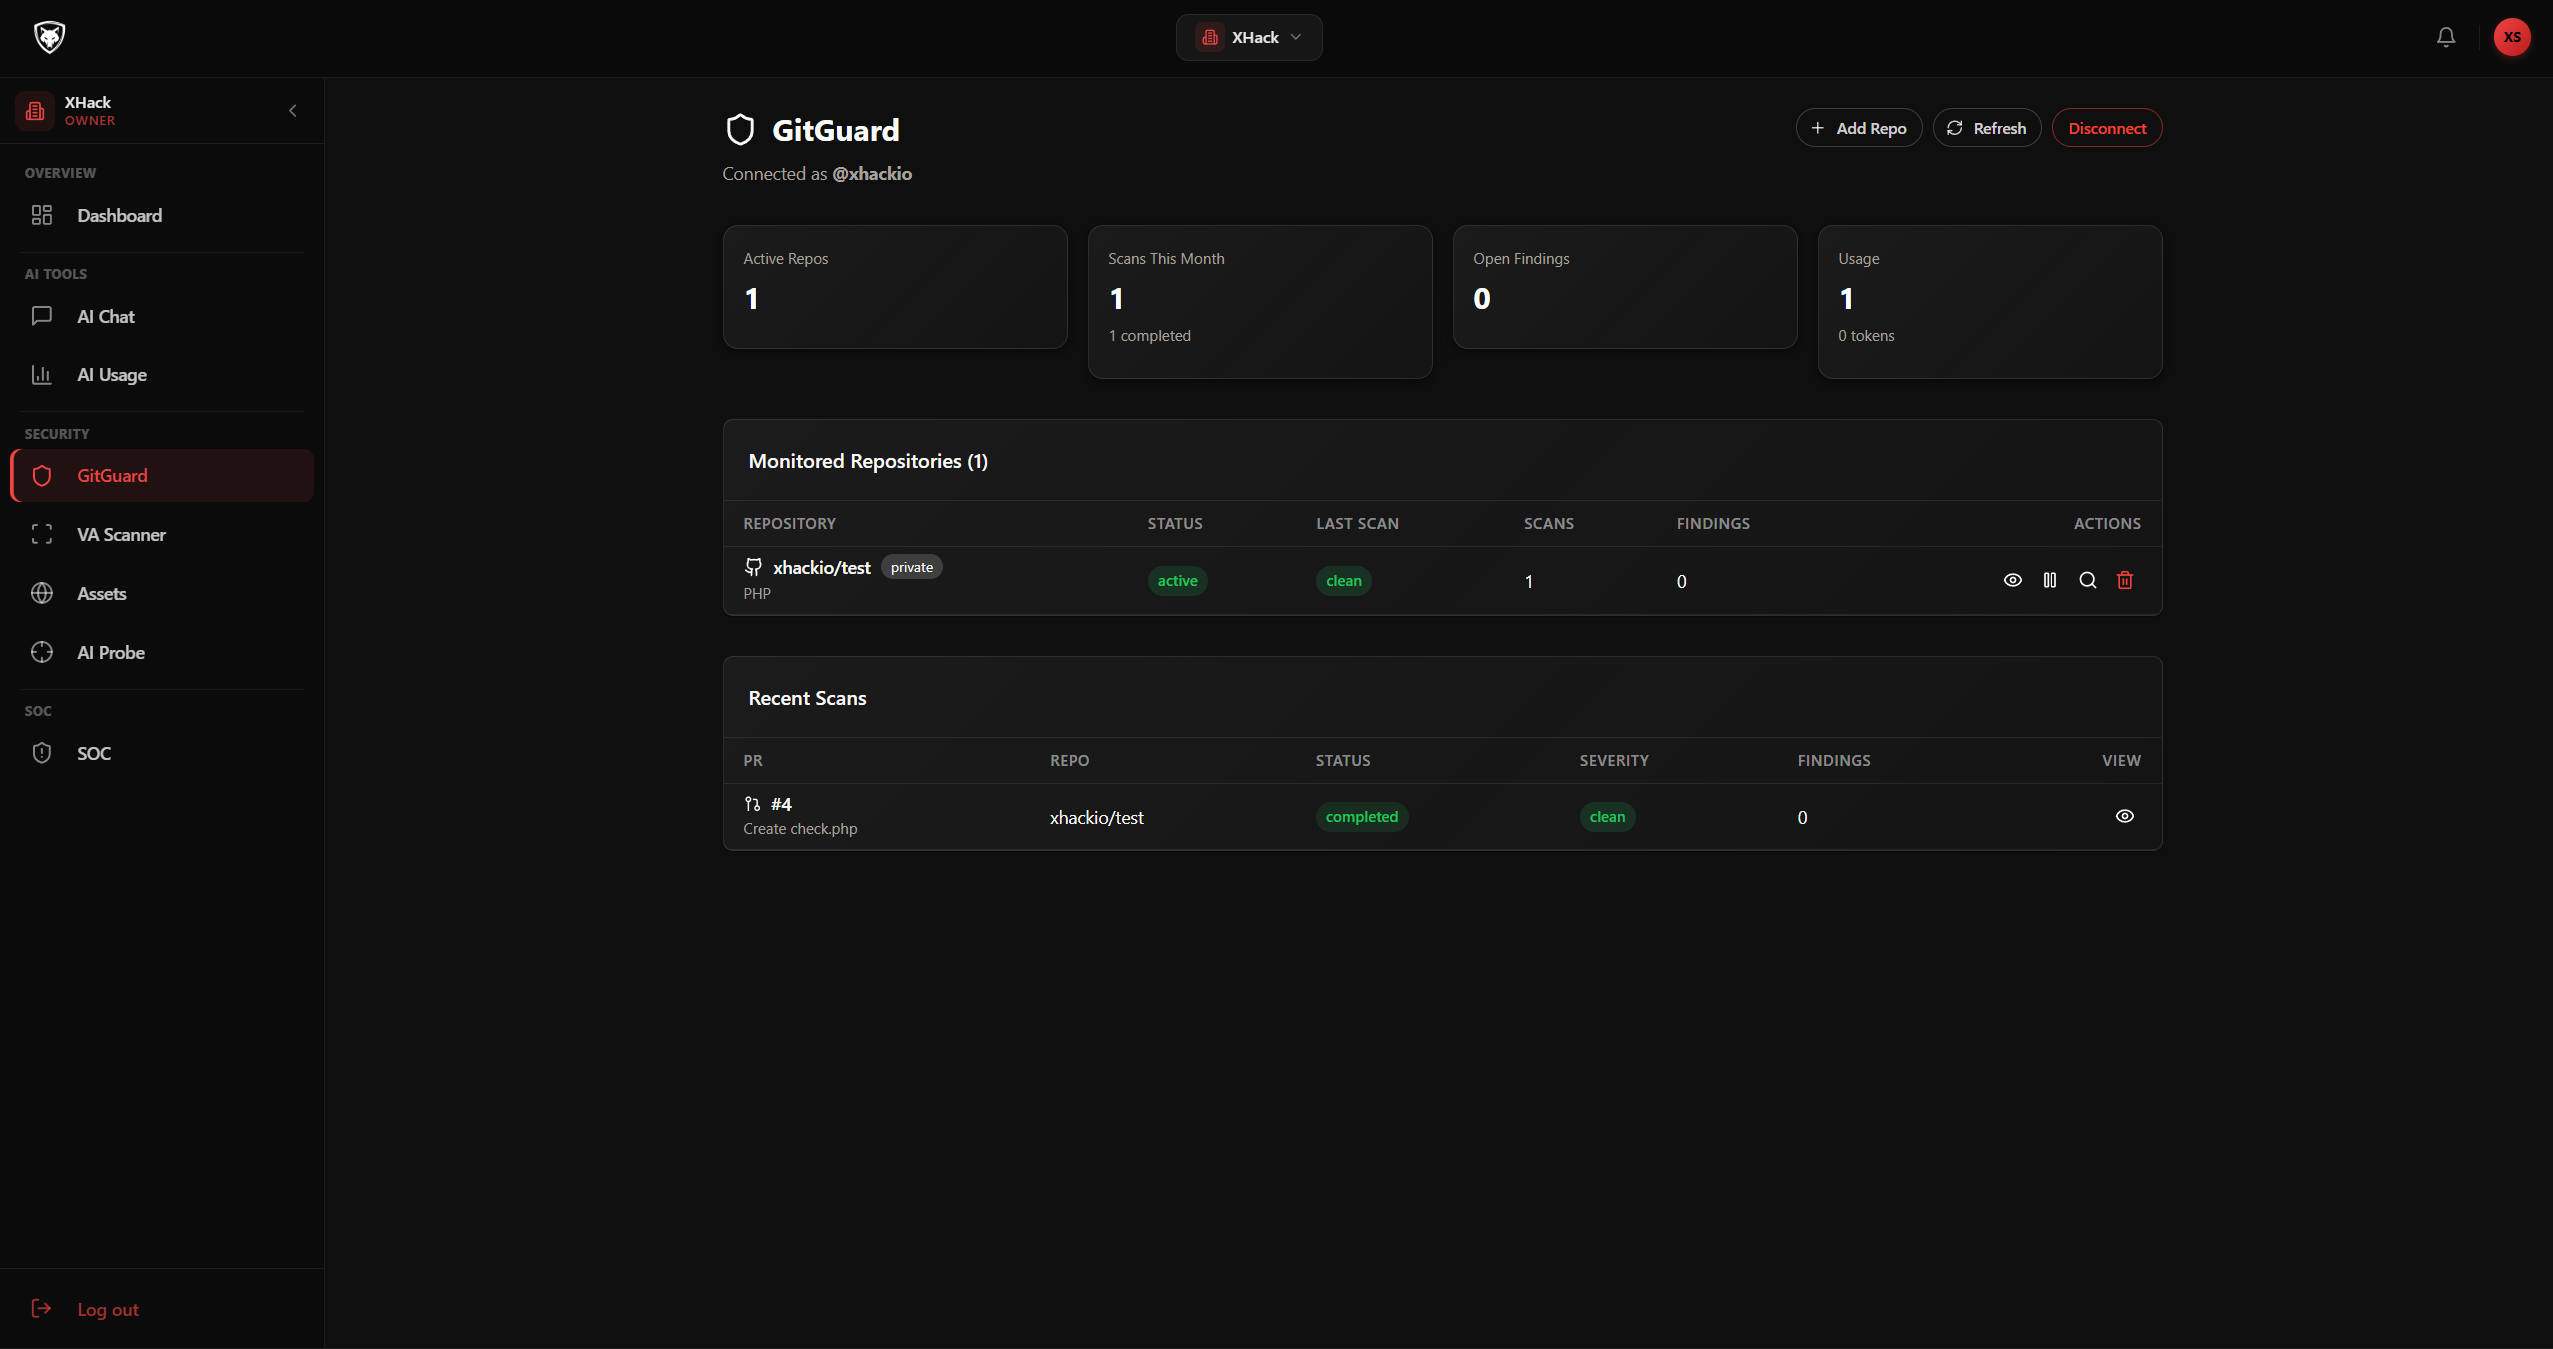
- You're redirected back to XHack and the GitGuard dashboard now shows "Connected as @your-github-username" at the top.
The OAuth token is Fernet-encrypted at rest. Click Disconnect at any time to revoke it — disconnecting removes all access immediately and deletes the stored token.
Step 2 — Add a repository to monitoring
Once connected:
- Click Add Repo (top right).
- The Add Repository to Monitoring dialog opens and loads the list of repos accessible to your connected GitHub account.
- Each repo card shows the full name (with a private chip if applicable), the language, and the description.
- Click Add on the repo you want to monitor.
If every accessible repo is already being monitored, the dialog shows "All repositories are already being monitored."
After adding, the repo appears in the Monitored Repositories table on the dashboard with status active.
Step 3 — Watch automatic scans
Once a repo is monitored, GitGuard automatically scans every pull request opened or updated against the default branch. There's nothing else to configure — no GitHub Action to install, no agent to deploy, no CI step to add.
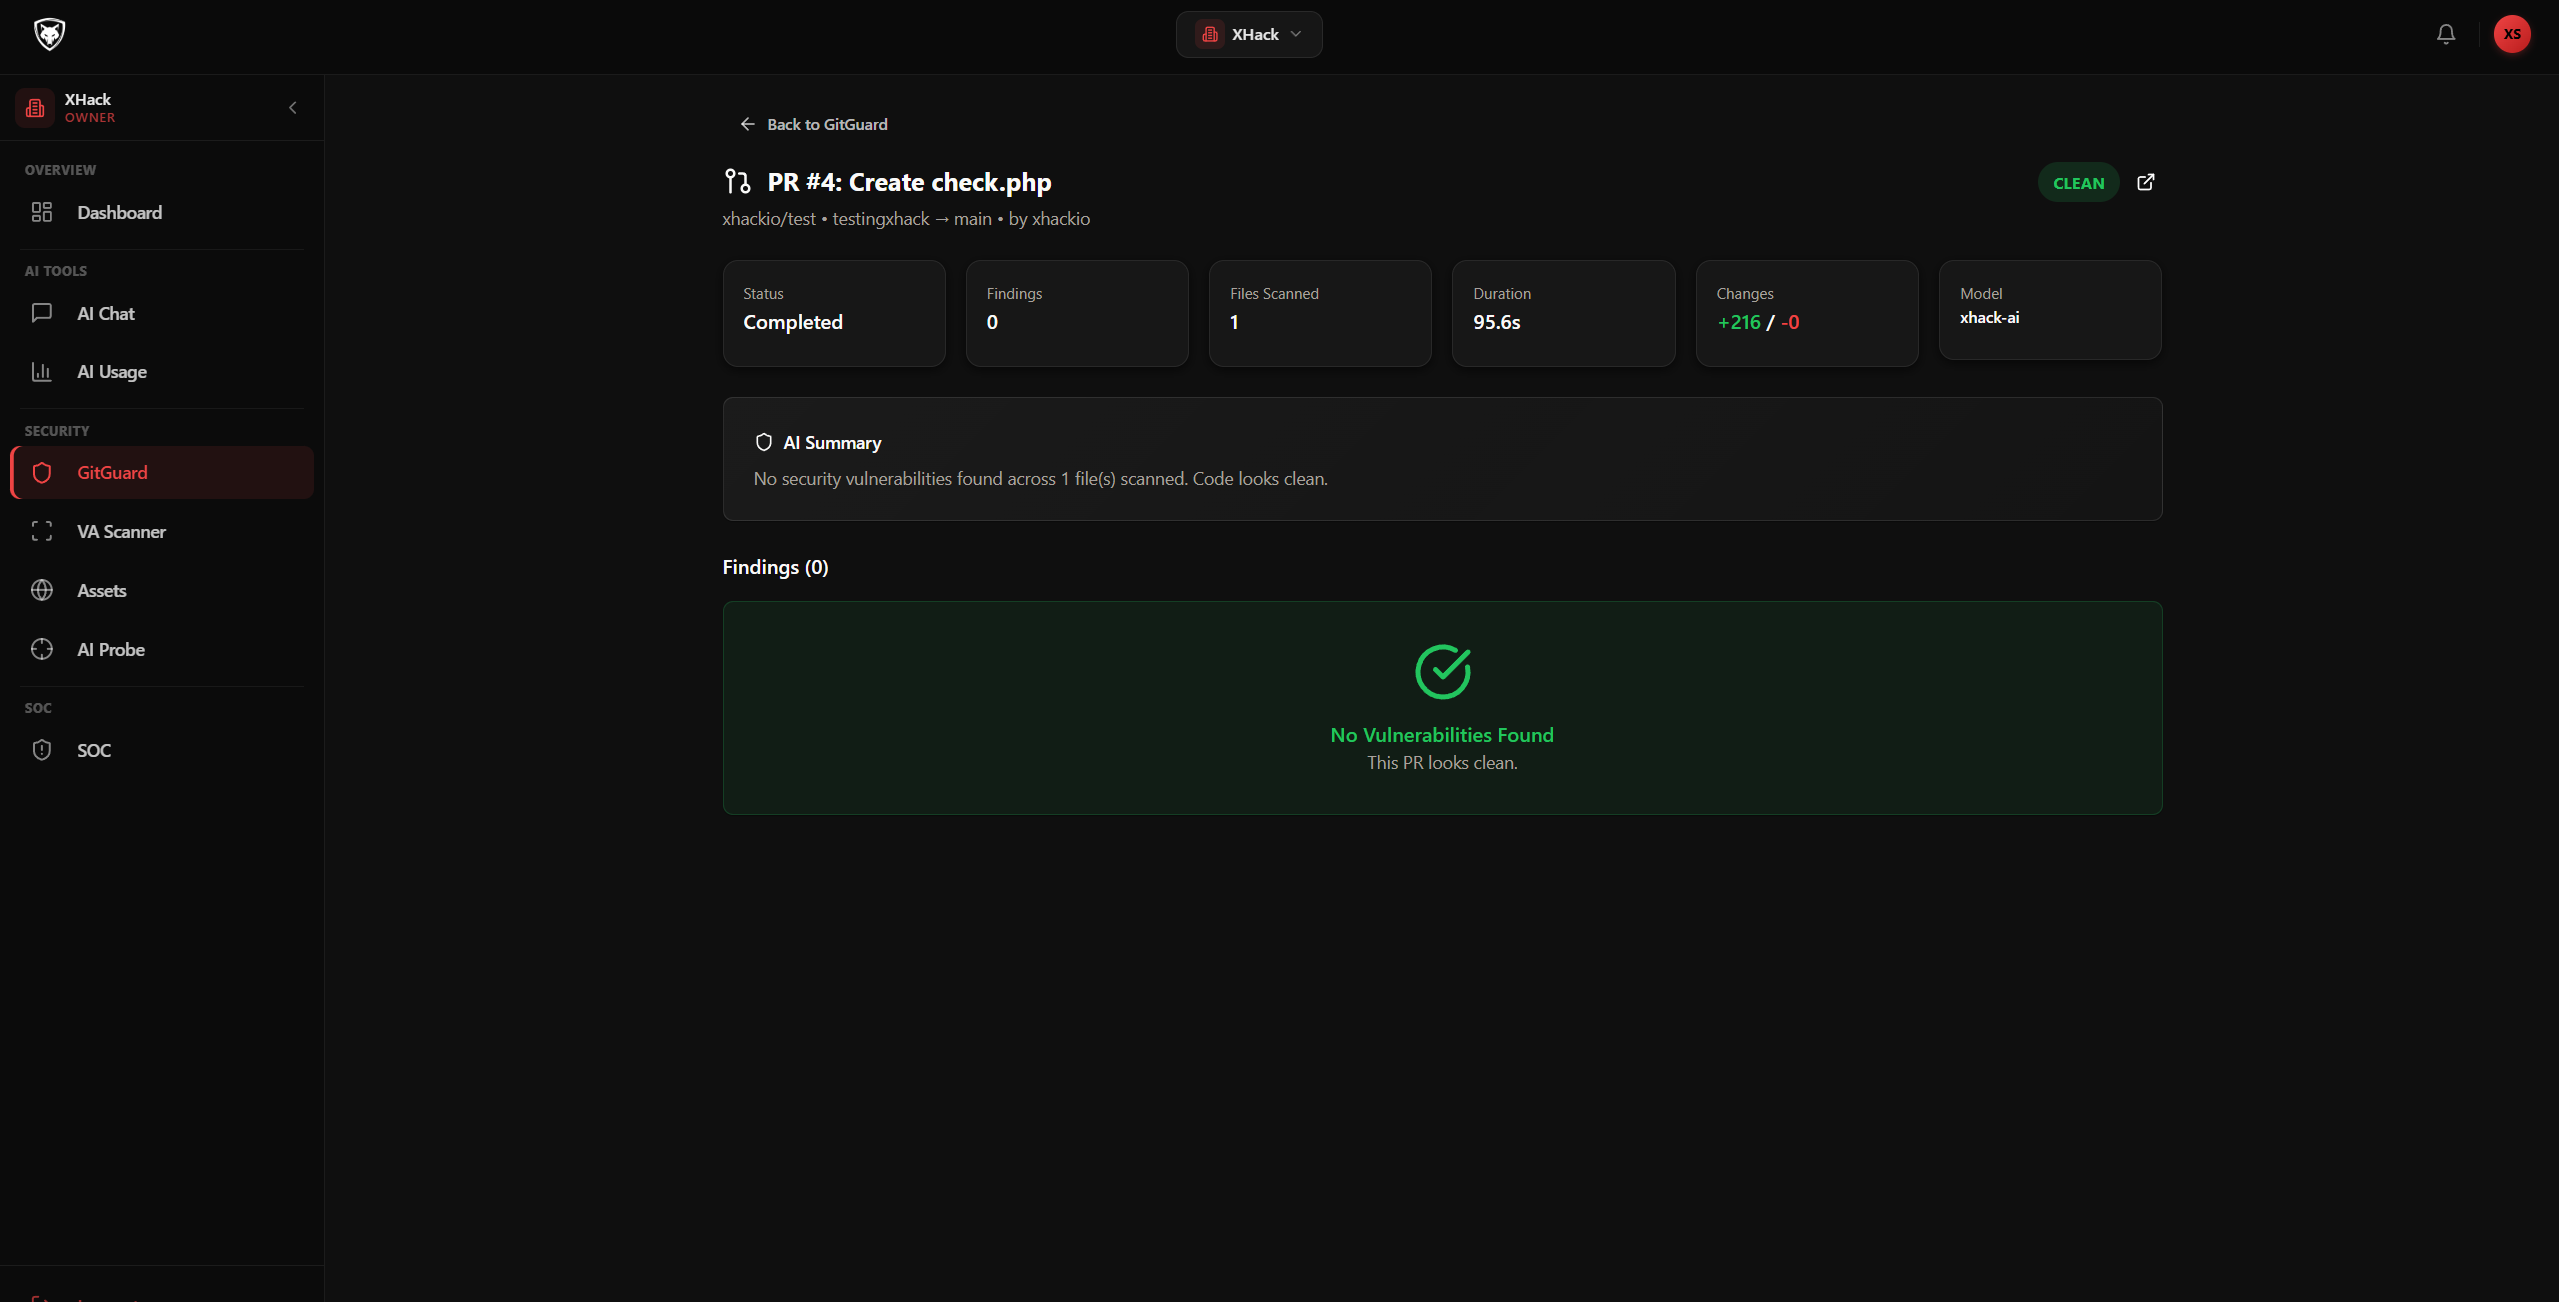
A new PR triggers a scan within seconds. You can watch live progress in the Recent Scans table at the bottom of the dashboard. Each row shows: PR number and title, repo, status (queued → scanning → completed), severity, finding count, and a View action.
When a scan completes, findings appear in two places:
- Inside XHack — in the scan detail page, with affected files, line numbers, and recommended fixes.
- On the GitHub PR itself — as inline review comments at the exact lines where issues were found.
Step 4 — Trigger a manual scan
Sometimes you want to scan a specific PR on demand — maybe you fixed something and want to re-check before merge.
- Find the repo in the Monitored Repositories table.
- Click the Manual Scan action (lightning icon) on the row.
- In the Trigger Manual Scan dialog, enter the PR Number.
- Click Scan.
The scan runs immediately and appears in the Recent Scans table.
Step 5 — Read a scan result
Click the View action (eye icon) on any row in Recent Scans, or click the row itself.
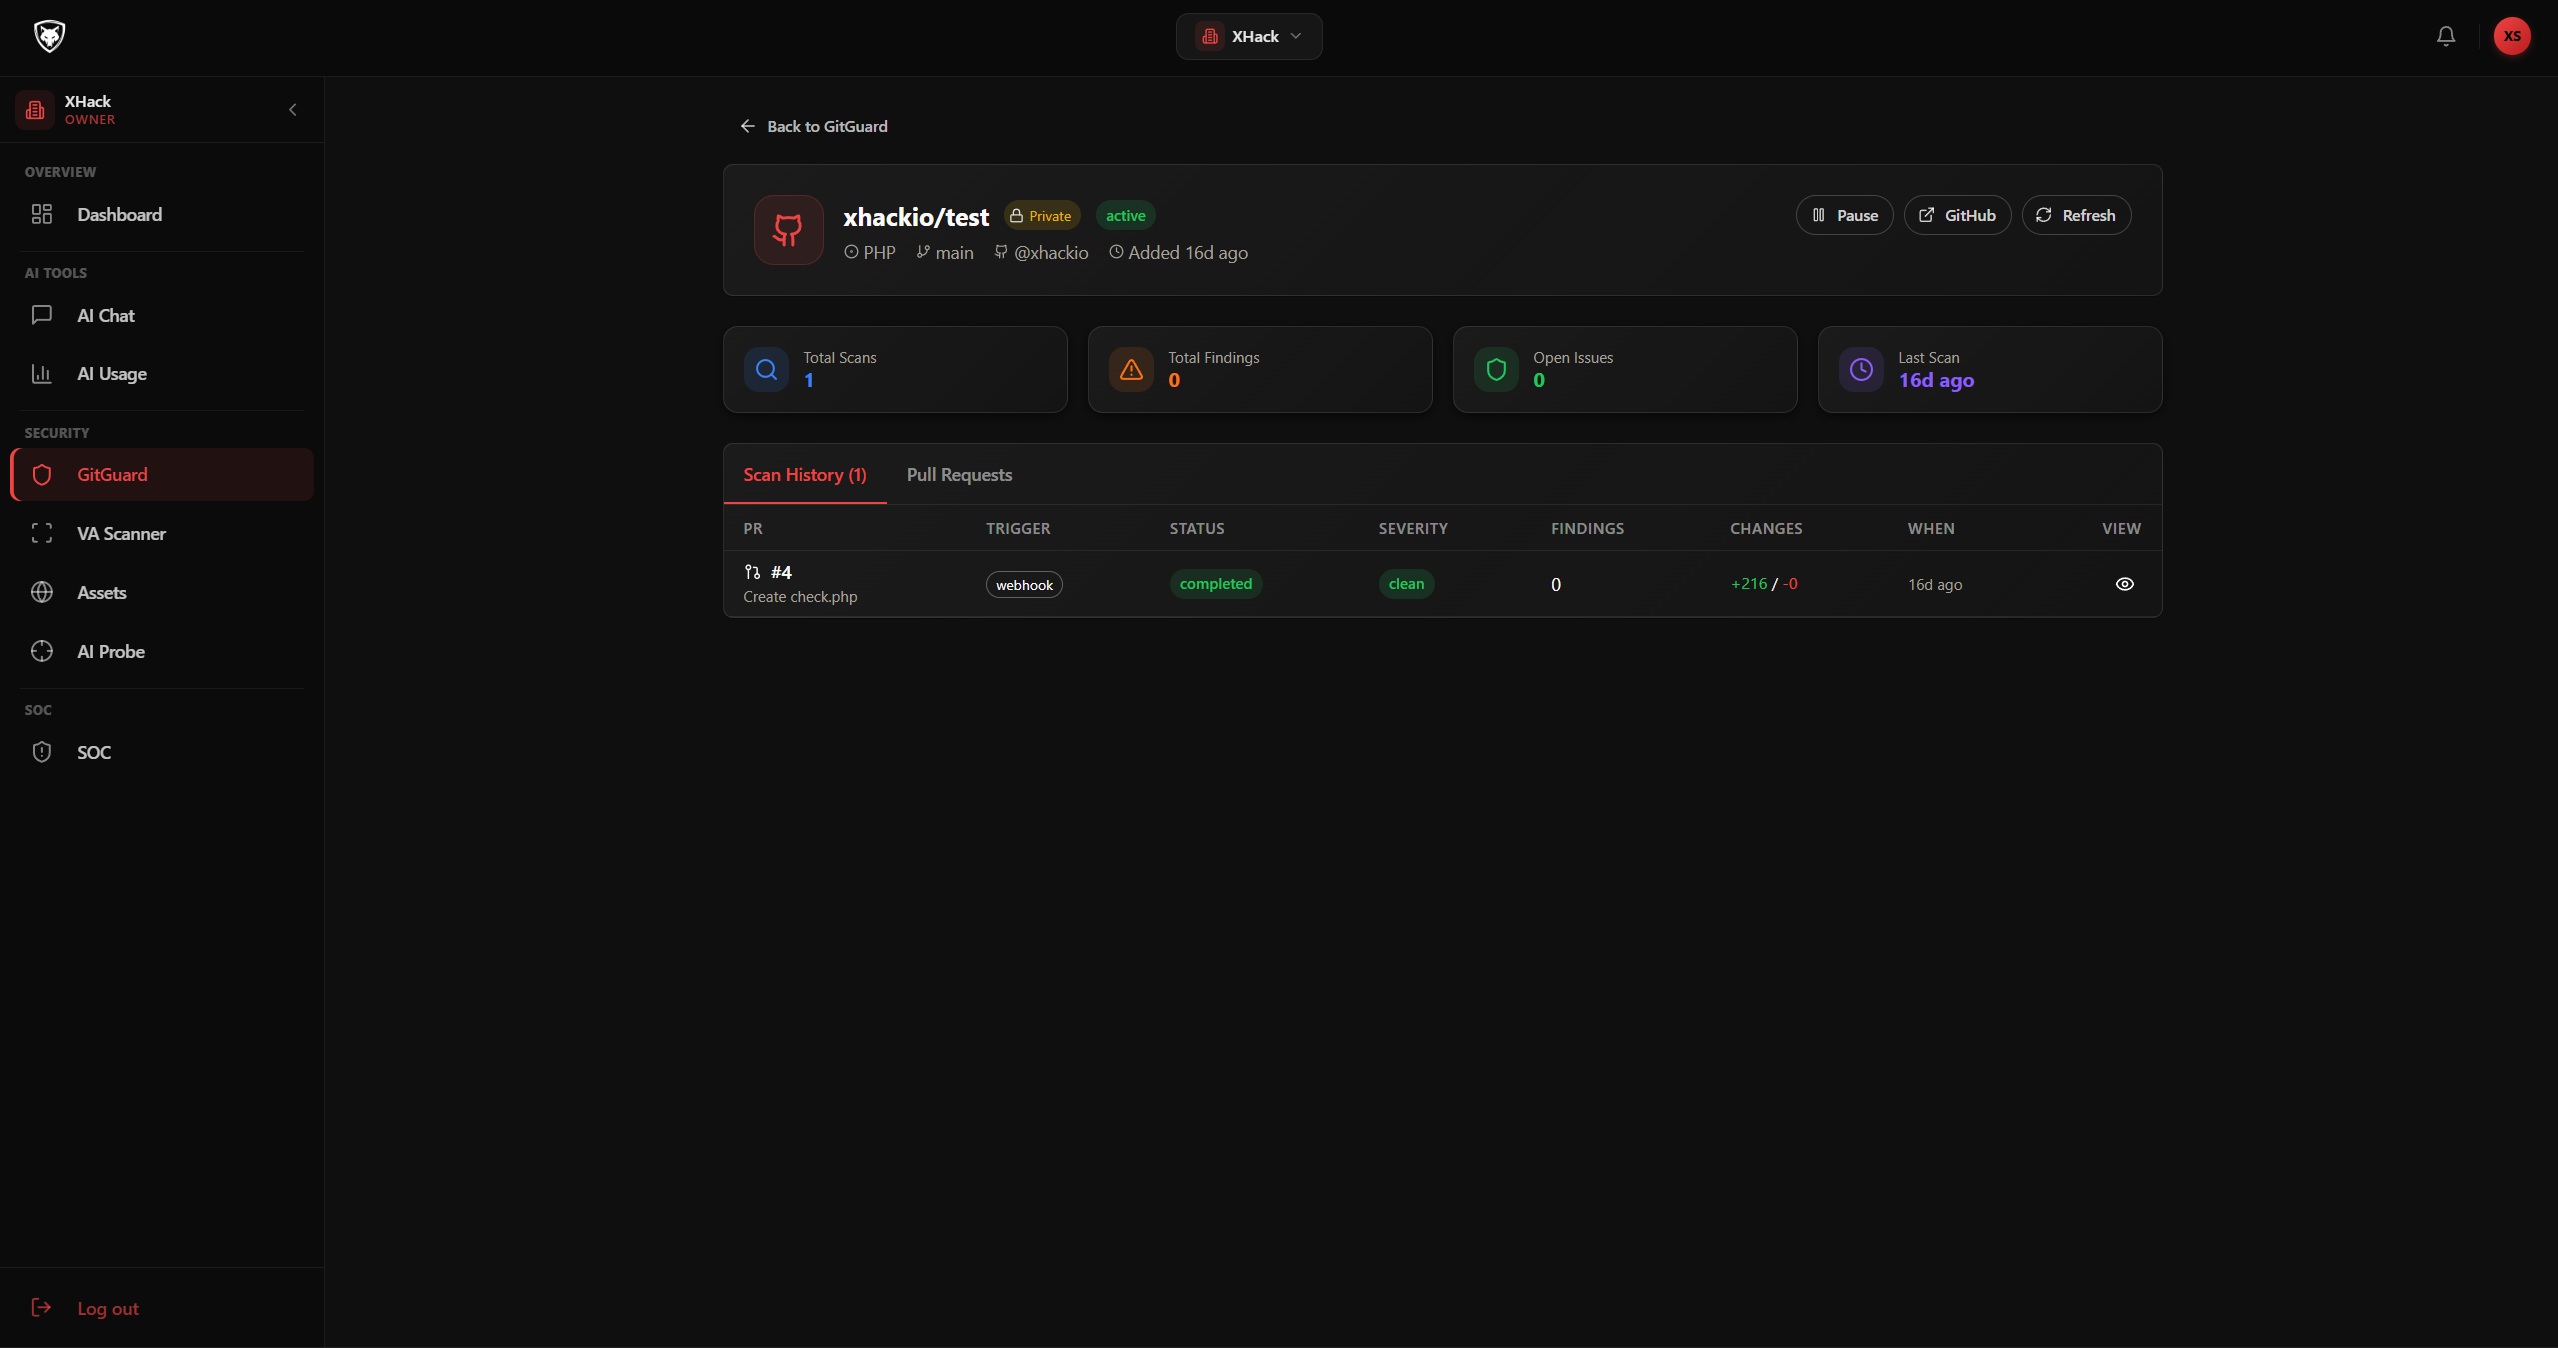
The scan detail page shows:
- PR title and link back to GitHub
- Severity — Critical / High / Medium / Low / Clean
- Findings count by severity
- List of findings, each with:
- File path and line number
- Severity chip
- Title (e.g. "SQL injection in user query handler")
- Snippet of the affected code
- Explanation of why it's a vulnerability
- Recommended fix
Click any finding to expand the full detail. The same finding is also visible as a comment on the PR in GitHub — your developers will see it during code review without ever opening XHack.
Pausing or removing a repo
To stop scanning a repo without removing it:
- Find the repo in the Monitored Repositories table.
- Click the Pause action (pause icon).
- The status chip changes from active to paused. New PRs are not scanned. Click Play to resume.
To stop monitoring entirely:
- Click the Remove action (trash icon).
- Confirm the removal.
- The repo is removed from monitoring and historical scans are kept. Re-add it later from Add Repo if needed.
Tips and best practices
- Add repos before opening PRs. GitGuard only scans PRs opened after the repo was added. Backfilling is not automatic.
- Watch the first few scans. New repos with novel patterns sometimes generate false positives in the first few runs. Use the View action to read each finding before reacting.
- Use the Pause state during noisy refactors. A massive refactor PR will generate dozens of findings that aren't really new vulnerabilities. Pause the repo, merge the refactor, then resume.
- Disconnect before rotating GitHub credentials. If you rotate the GitHub OAuth app secret, disconnect first, then reconnect with the new credentials. Otherwise the old token sits encrypted and unusable.
- Subscribe to email notifications. In Settings → Integrations, subscribe to
scan_completeandvulnerability_foundevents for GitGuard so security leads are alerted automatically. - Don't merge a critical PR finding without acknowledgement. GitGuard does not block merges (yet) — that's a process discipline you have to enforce in your team.
Privacy
GitGuard processes code in an ephemeral environment that is destroyed as soon as the scan completes. Source code is never persisted on the platform — only the findings (file path, line number, snippet, explanation) are stored. The GitHub OAuth token is Fernet-encrypted at rest and never returned in API responses. Disconnecting GitHub revokes the token and removes it from storage immediately.
Related
Try XHack AI Now
Experience the full power of XHack directly in your browser. No installation required.
Launch XHack AI