
Settings & Administration
How to manage your organization, invite members, create roles, generate API keys, connect integrations, and configure billing.
Settings & Administration
This is the admin's playbook for managing the XHack tenant. Each section below covers one settings page with the actual flows you'll use day to day. You need the tenant.manage permission to access most of this — Owners and Admins have it by default.
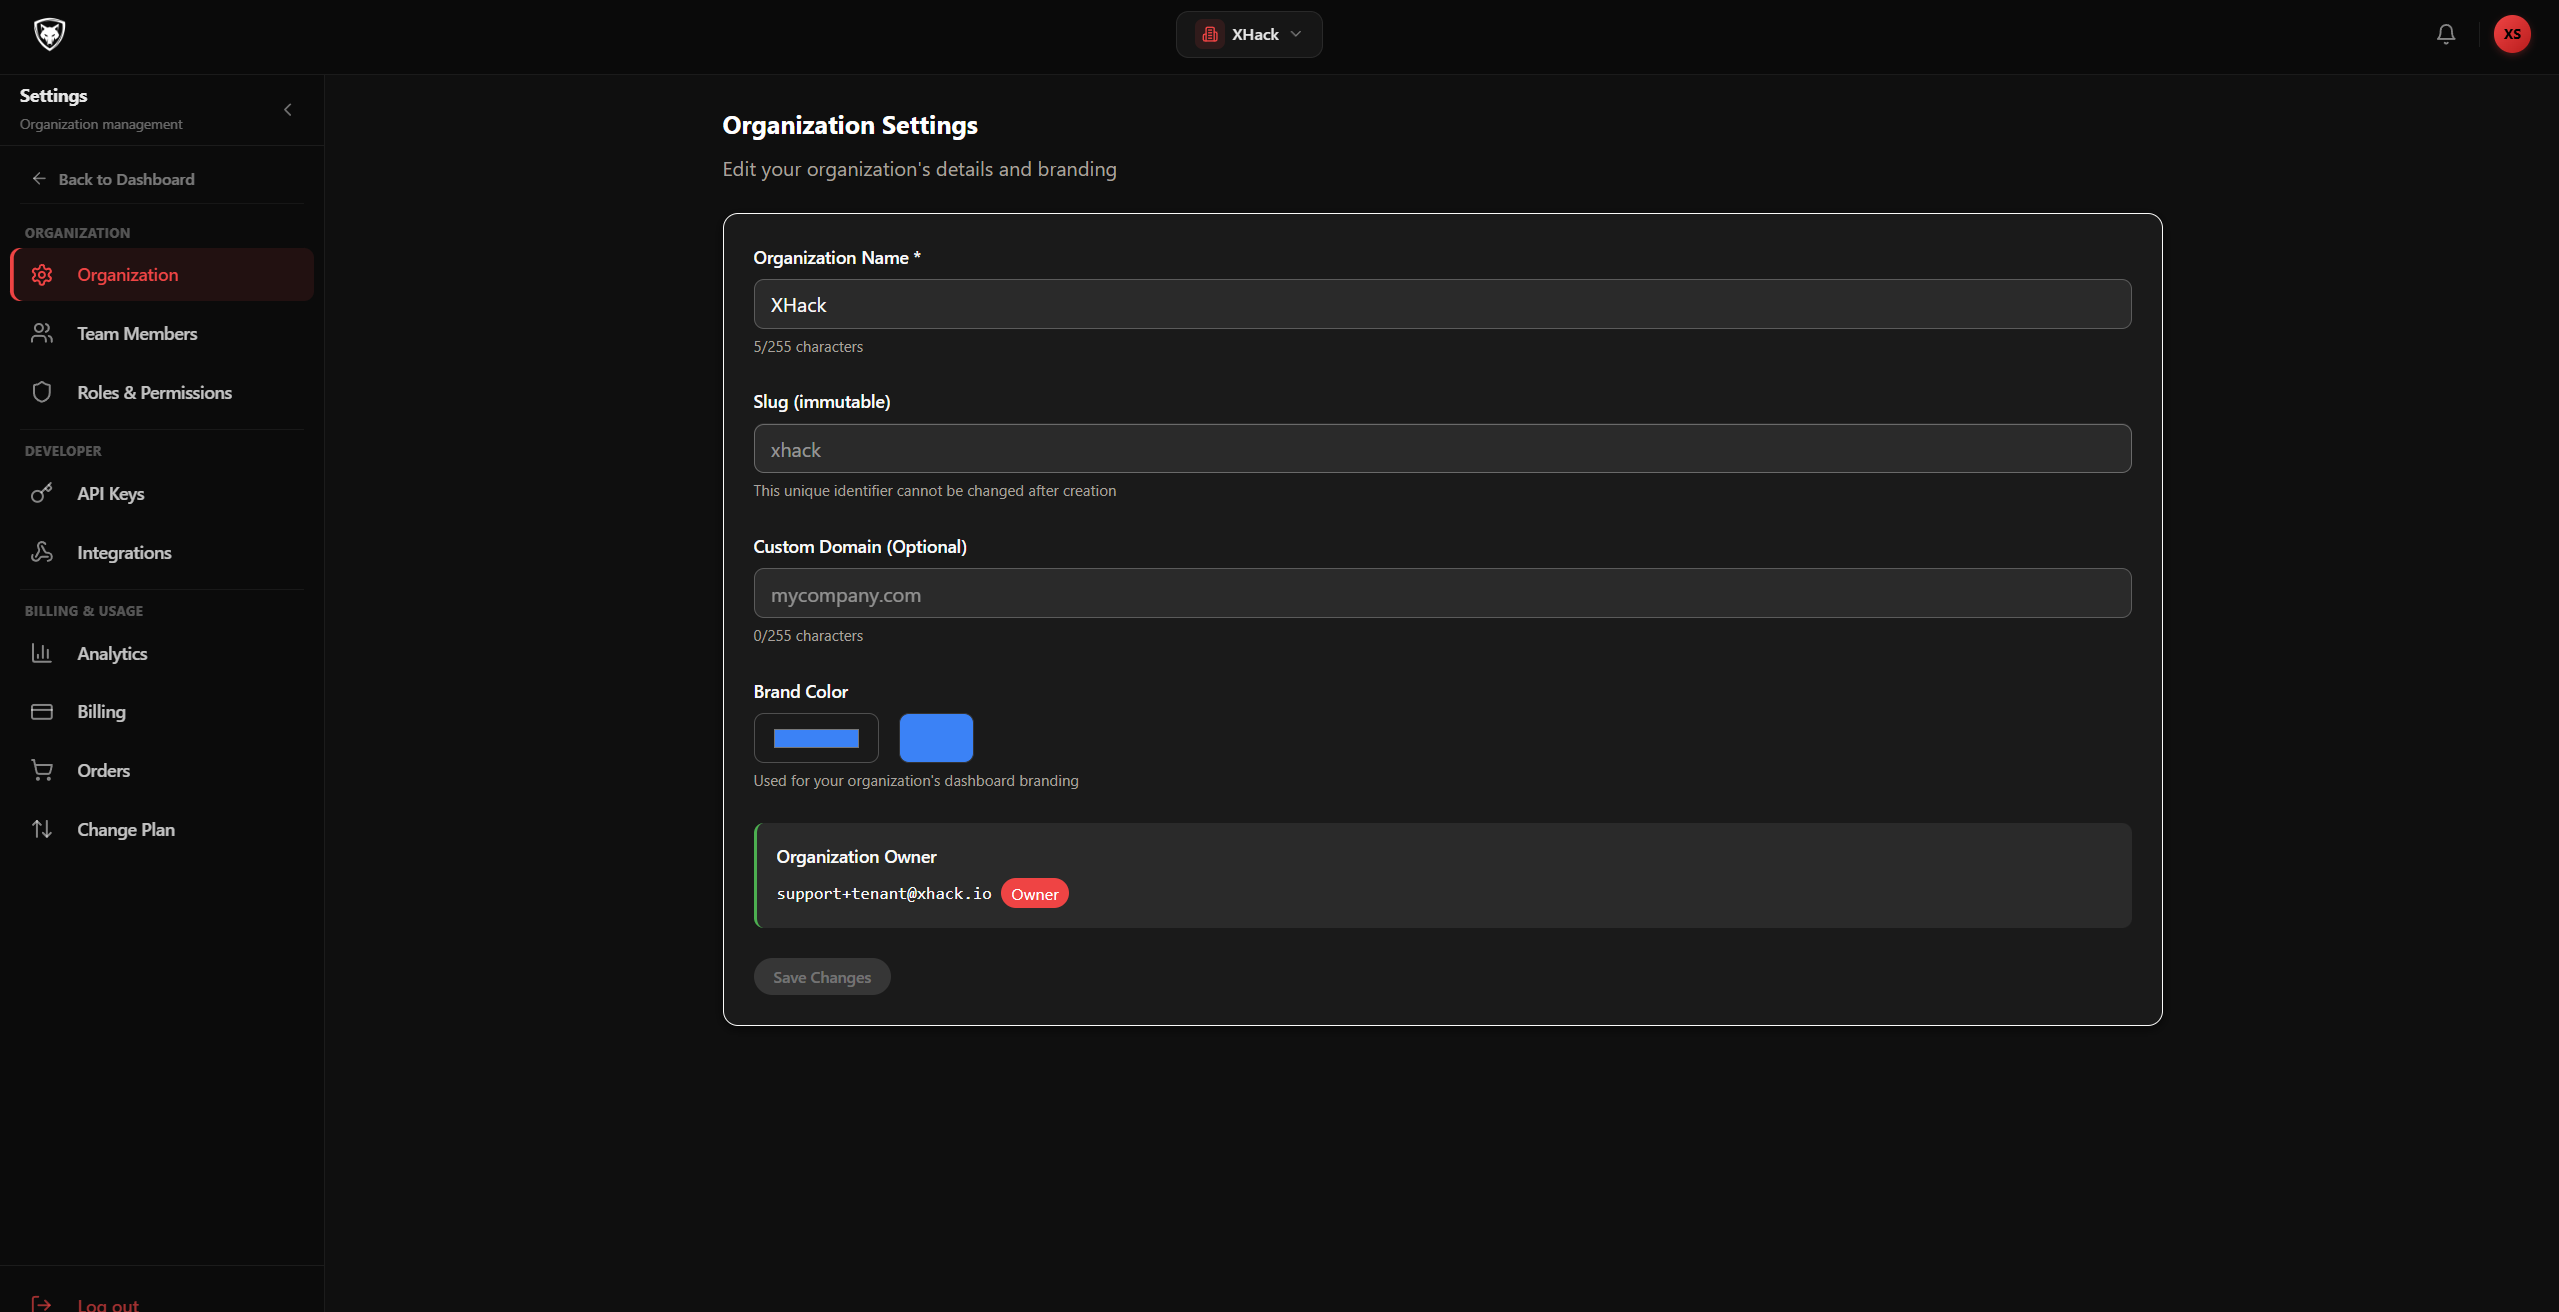
Step 1 — Open Settings
Click Settings in the sidebar (bottom). The settings sub-navigation shows:
- Tenant — organization profile
- Members — team management
- Roles — custom permission roles
- API Keys — programmatic access
- Integrations — webhooks and third-party connections
- Billing — plan, usage, invoices
- MFA — multi-factor authentication
Step 2 — Invite a team member
Open Settings → Members.
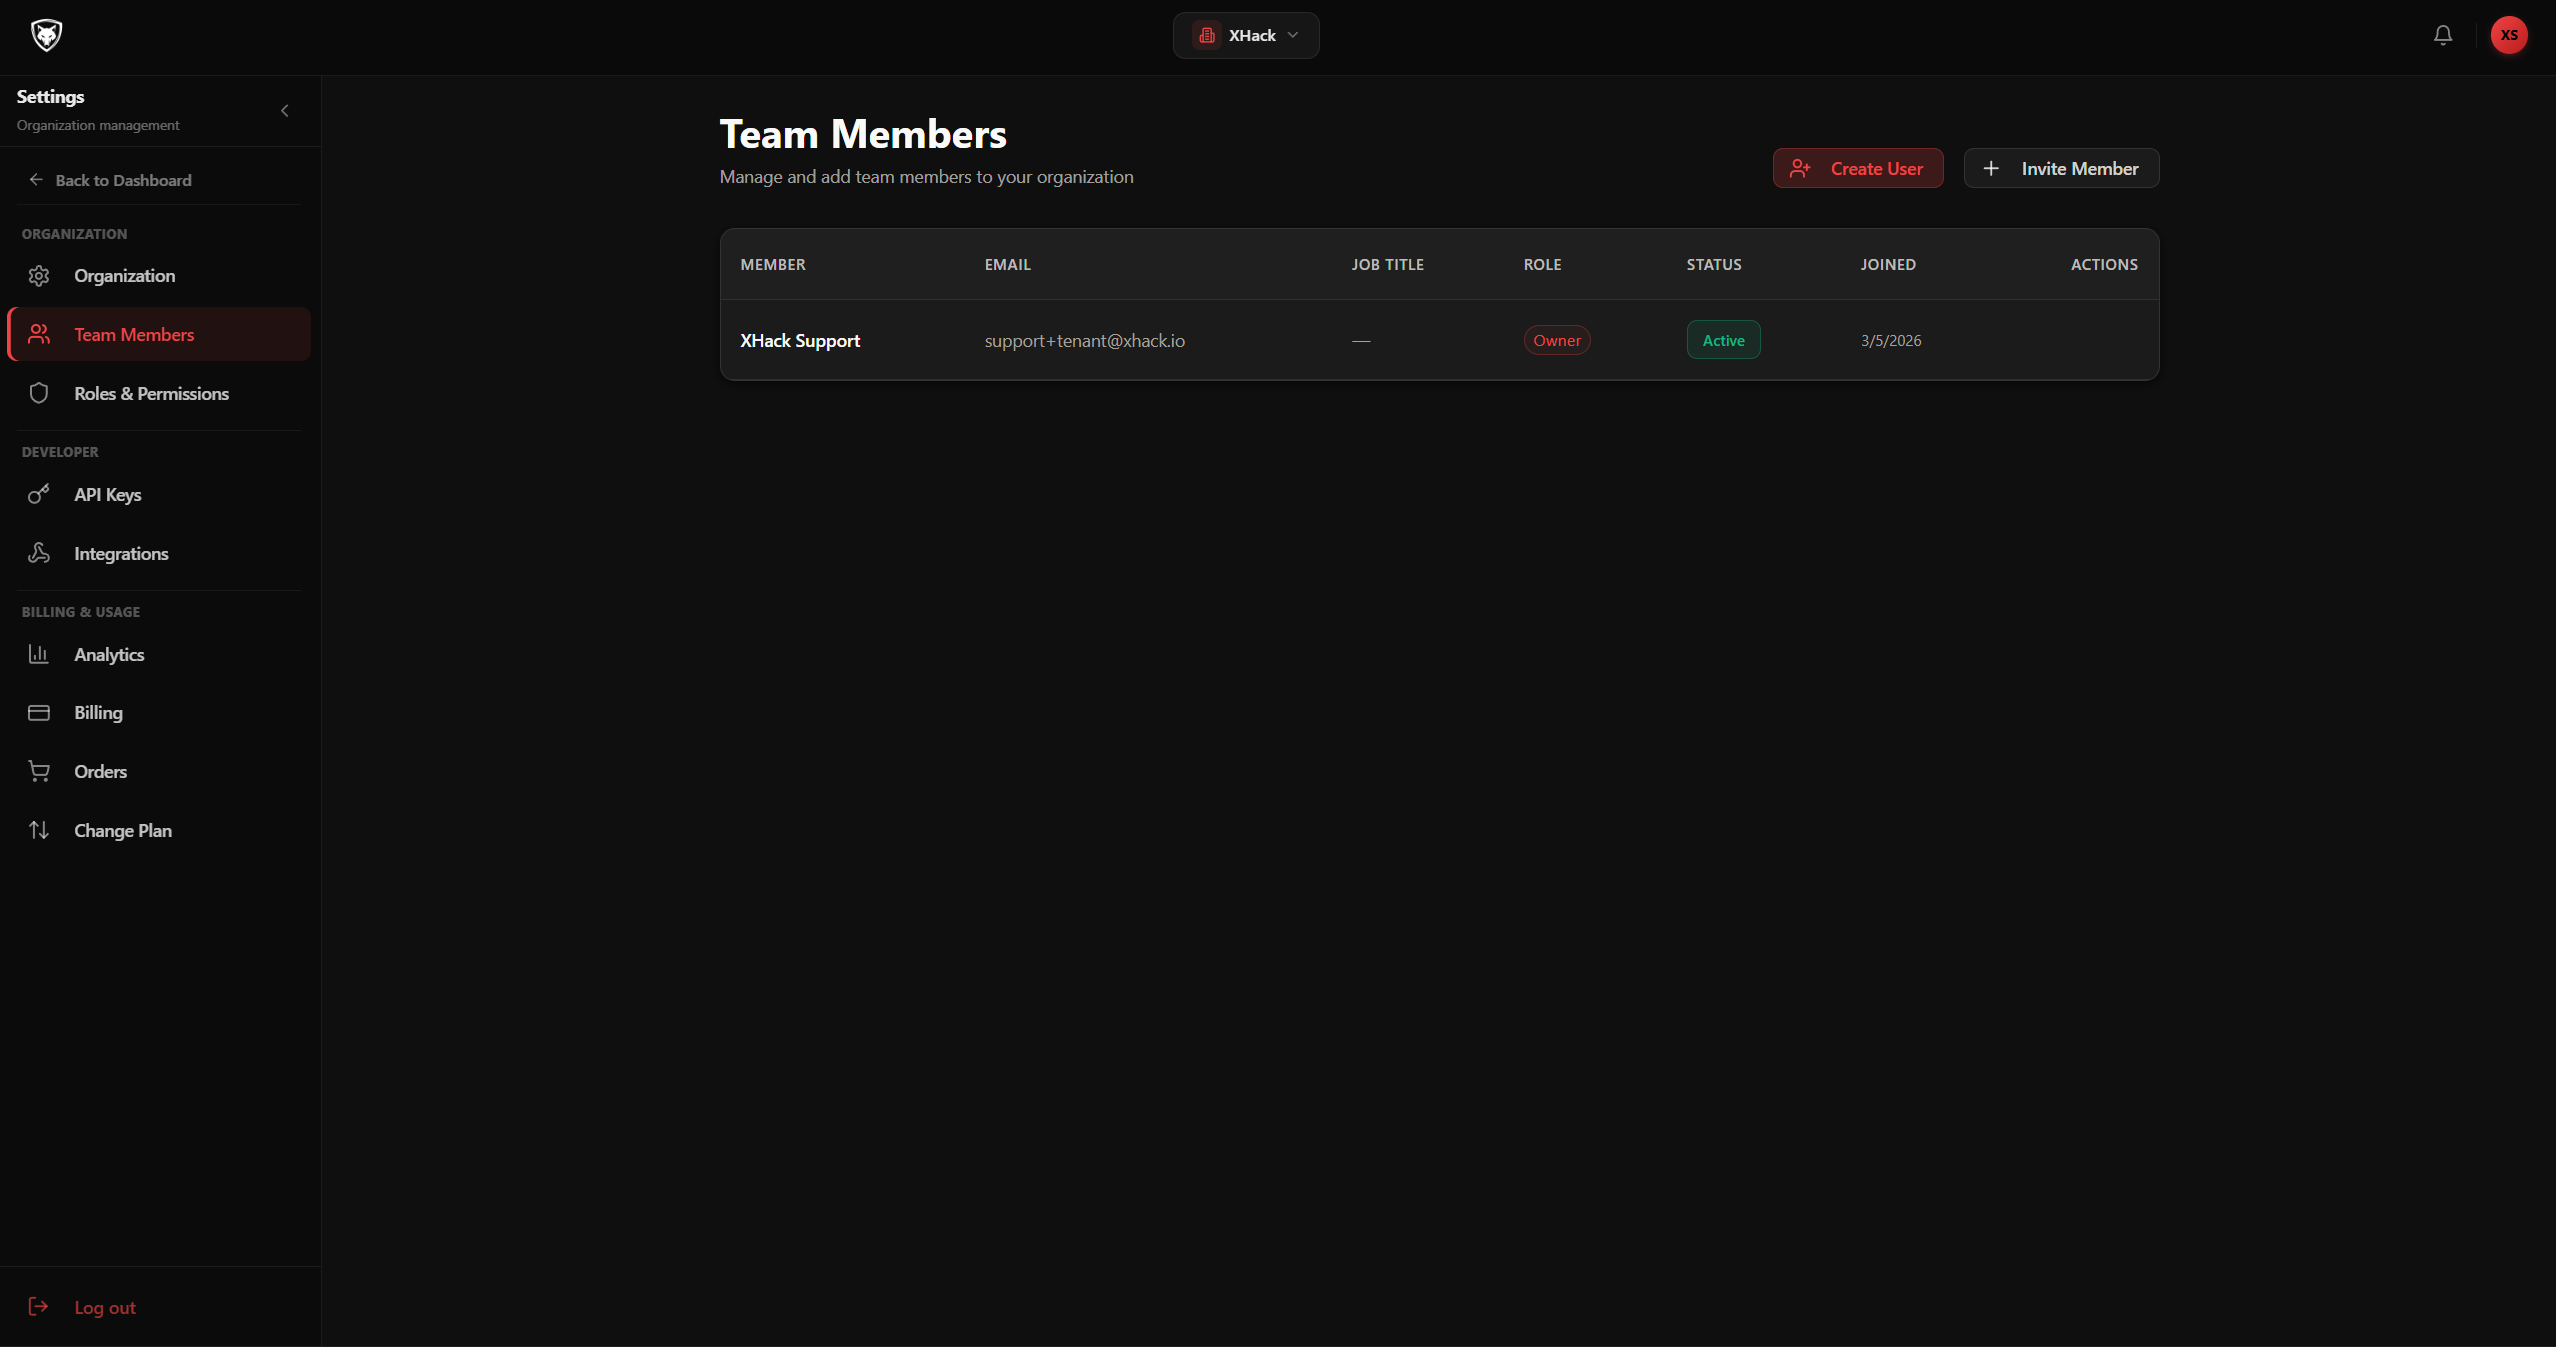
The page header shows "Team Members — Manage and add team members to your organization" with Create User and Invite Member buttons.
To invite someone to join the tenant:
- Click Invite Member.
- Enter their email.
- Pick a role from the dropdown (Owner, Admin, Member, or any custom role you've created).
- Add an optional message.
- Click Send Invite.
The invitee gets an email with a one-click join link. Once they accept, they appear in the Members table with status Active.
The members table shows: name, email, job title, role (chip), status (Active / Inactive badge), join date, and per-row actions for Edit, Suspend/Activate, Reset MFA, and Remove.
Suspending a member
If someone leaves temporarily or you need to lock their access while investigating:
- Find the member in the table.
- Click Suspend in the actions column.
- Confirm in the Suspend Member dialog.
A suspended member cannot sign in. Click Reactivate on the same row to restore access.
Resetting a member's MFA
If a teammate loses their authenticator app:
- Click Reset MFA in their row.
- Confirm in the Reset MFA dialog: "This will remove their current MFA setup. They will need to set up two-factor authentication again on their next login."
- The member is notified by email.
Removing a member
- Click Remove in the actions column.
- Confirm in the Remove Member dialog (warning shown: "This action cannot be undone").
- The member is removed and loses access immediately.
The Owner cannot be removed by anyone — Owner transfer requires support.
Step 3 — Create a custom role
Open Settings → Roles.
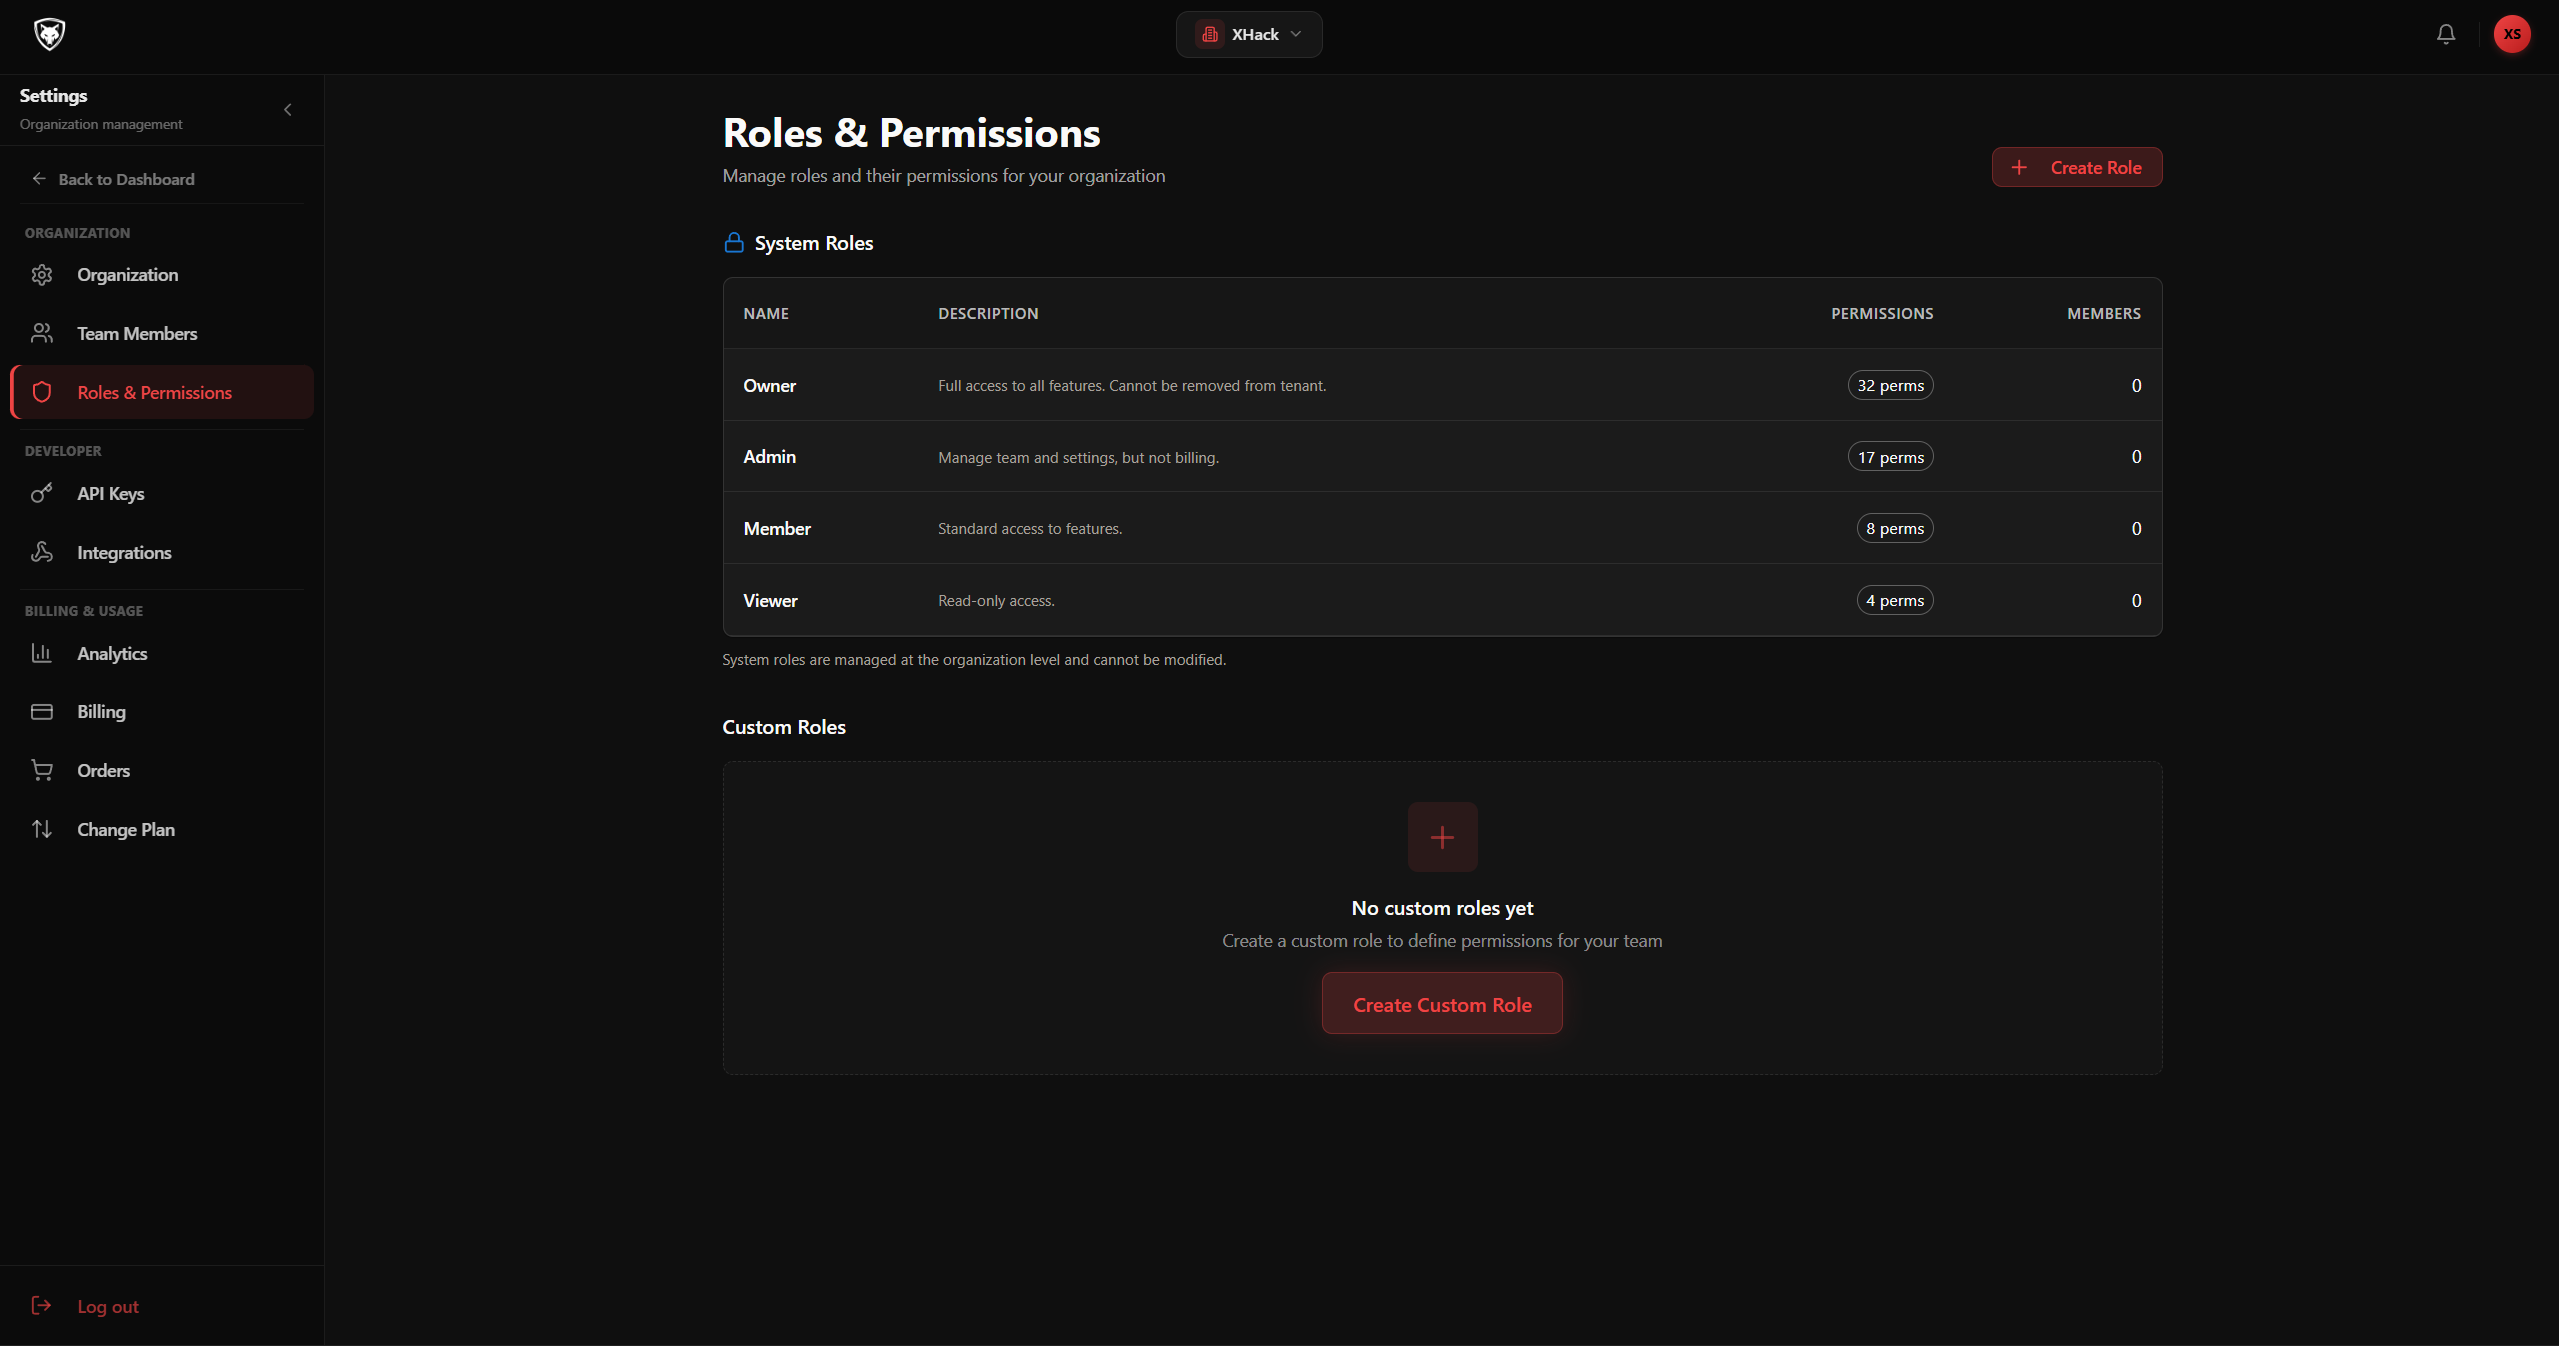
The default roles cover most teams:
- Owner — everything, including billing and tenant deletion
- Admin — everything except billing and ownership transfer
- Member — use features but cannot configure them
If you need finer control, create a custom role:
- Click Create Role.
- Give it a name and description (e.g. "VA Operator — can run VA scans and view findings, nothing else").
- Tick the per-feature permissions:
va.view,va.run,soc.view,ai_probe.run, etc. - Click Create.
You can now assign this role when inviting members or by editing existing members.
Step 4 — Generate an API key
Open Settings → API Keys.
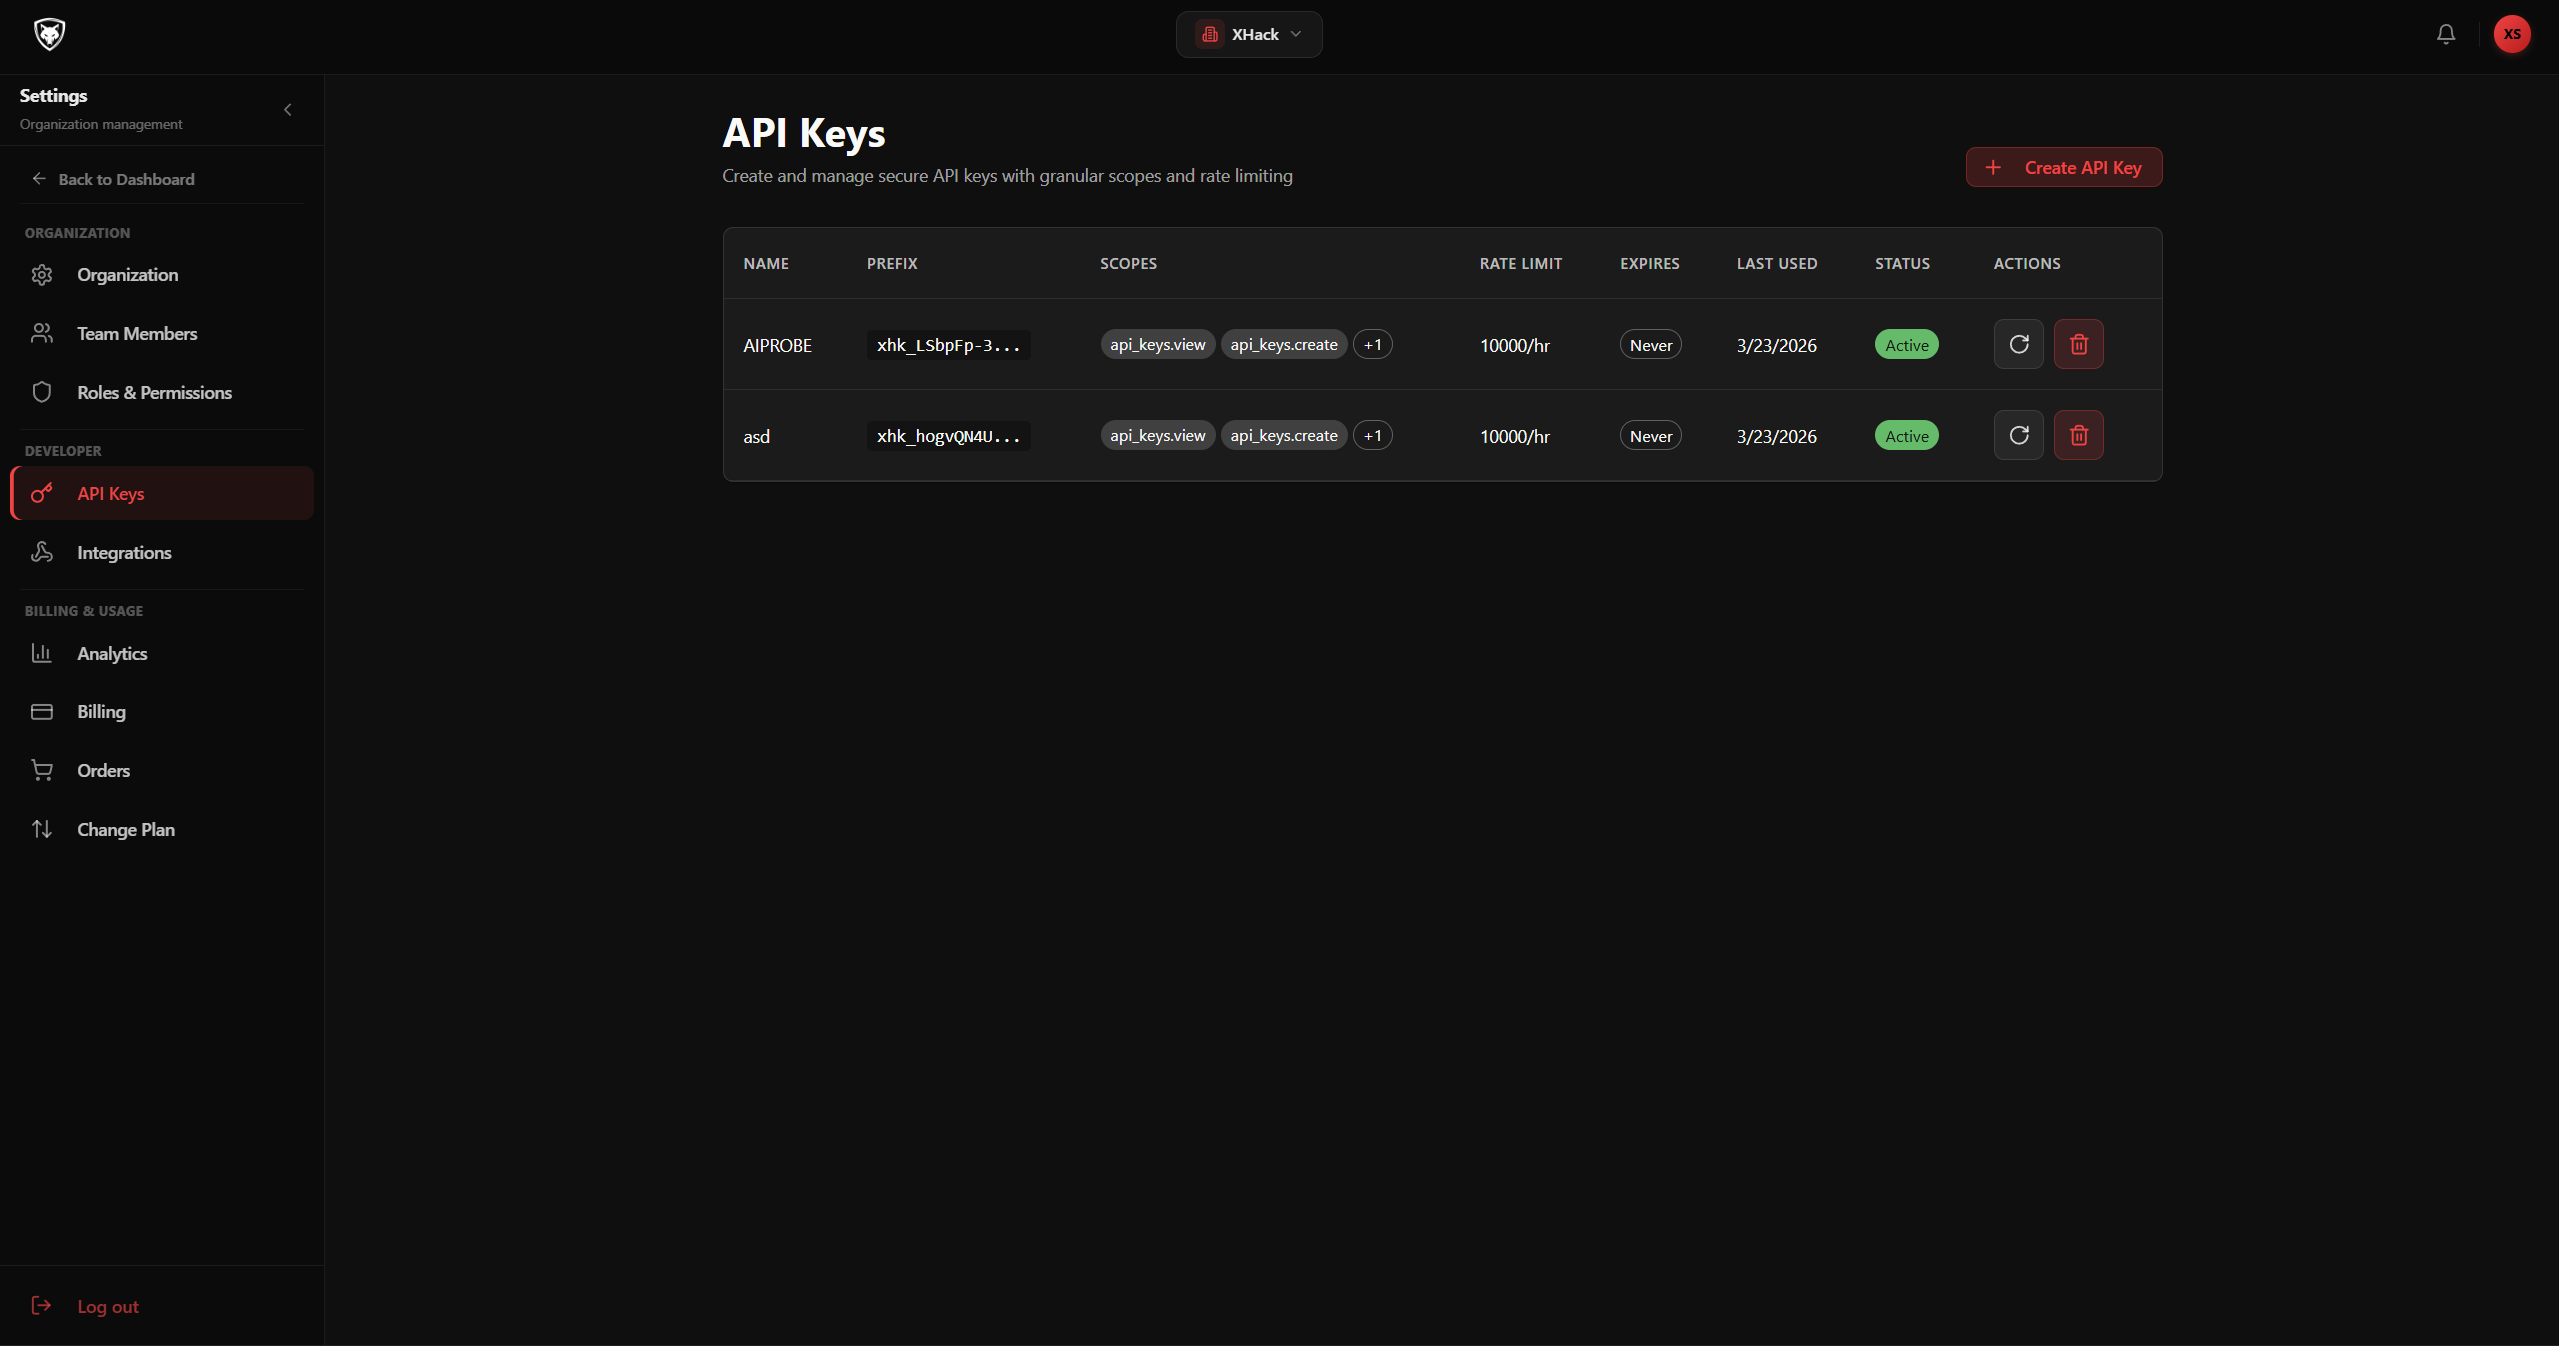
The header shows "API Keys — Create and manage secure API keys with granular scopes and rate limiting" with a Create API Key button.
To generate a new key for CI/CD or automation:
- Click Create API Key.
- In the Create API Key dialog:
- Key Name — e.g.
Production CI pipeline - Scopes (Permissions) — tick the permissions this key needs. Available scopes include
api_keys.view,api_keys.create,api_keys.manage,api_keys.delete,tenant.view,tenant.manage,ai.chat,ai.images,analytics.view - Rate Limit (requests/hour) — default
1000 - Expiration Date — optional, datetime picker
- Key Name — e.g.
- Click Create Key.
- The Save Your API Key modal appears with a warning: "This is the only time you'll see this key. Save it somewhere safe!"
- Copy the key to your secrets manager (1Password, Vault, AWS Secrets Manager, etc.).
- Click I've Saved My Key.
After this point, only the prefix is visible in the API Keys table. The full key is never returned again — losing it means revoking and creating a new one.
Rotating a key
- Click the Rotate action (icon) on the row.
- The platform generates a new key with the same name and scopes.
- The same "Save Your API Key" modal appears.
- Update your CI/CD systems with the new key.
- Once everything is migrated, revoke the old key.
Revoking a key
- Click the Revoke action (red icon) on the row.
- Confirm in the Revoke API Key? dialog.
- The key is permanently revoked. Any system using it stops working immediately.
The API Keys table shows: name, prefix (e.g. abc123...), scopes (chips, "+X more" for long lists), rate limit, expires, last used, status (Active / Inactive), and actions.
Step 5 — Connect an integration
Open Settings → Integrations.
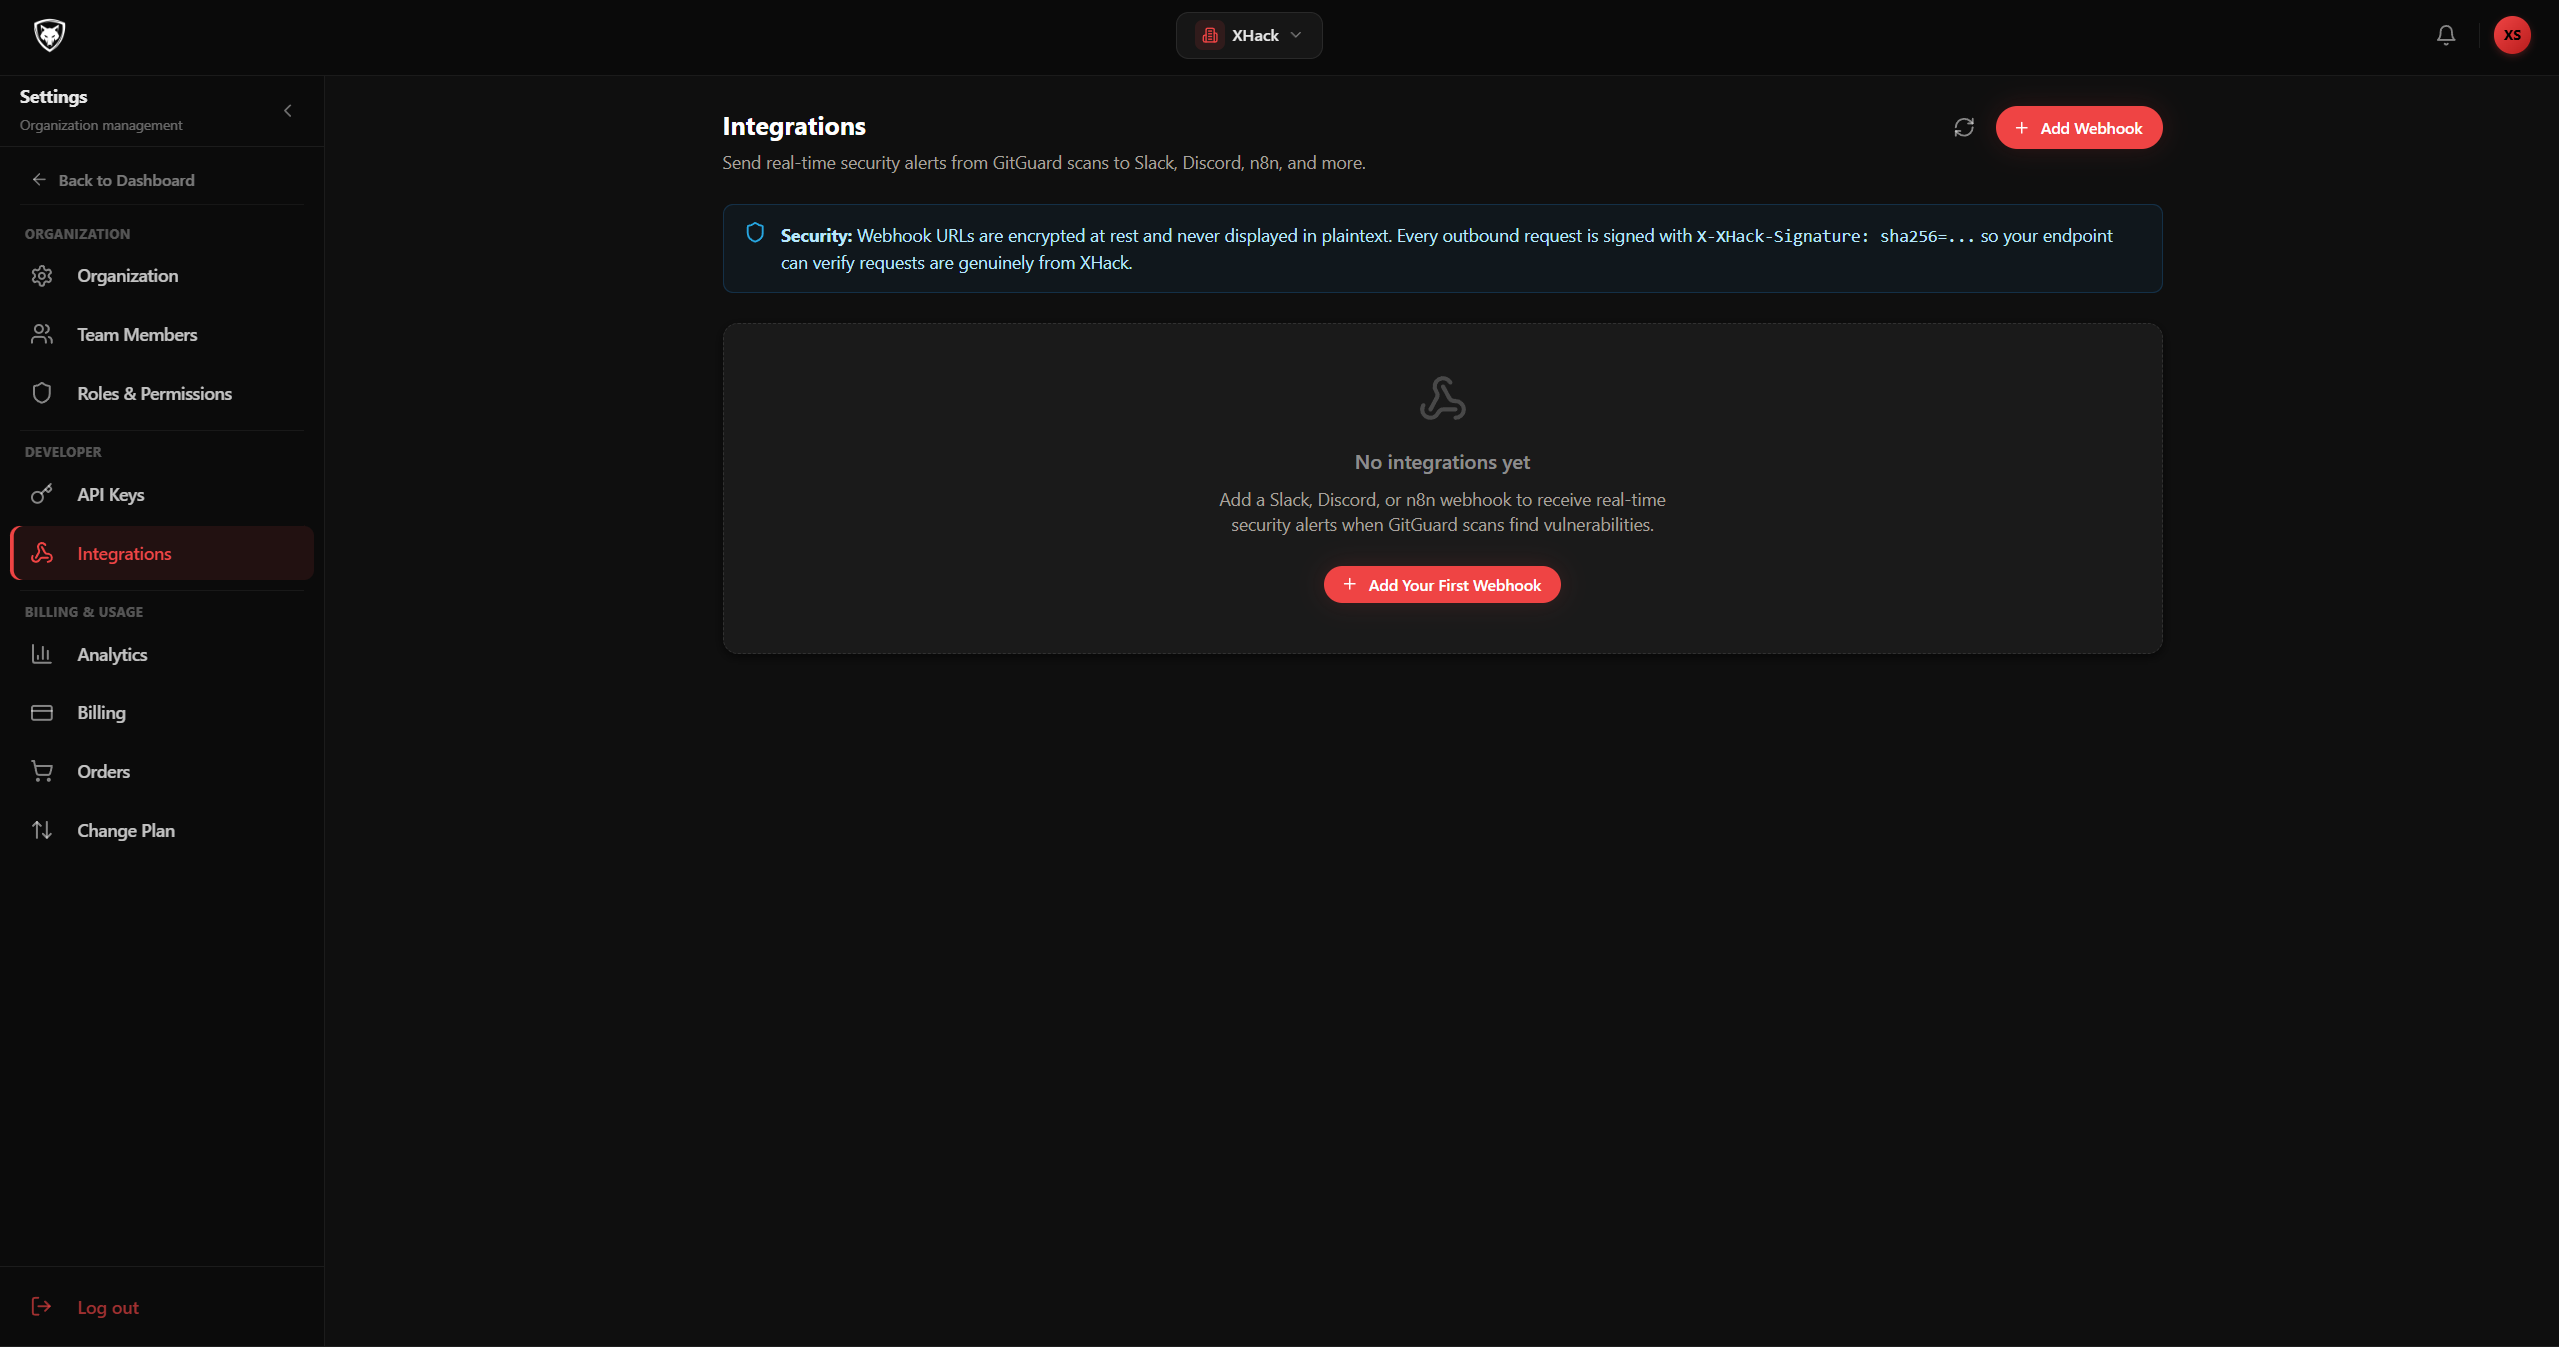
Integrations are split into inbound (data flowing in) and outbound (notifications flowing out).
Inbound:
- GitHub — for GitGuard PR scanning. See the GitGuard doc.
- Cloudflare — for SOC log ingestion. Configured under Log Sources, not here.
- Wazuh — same.
Outbound webhooks:
- Click Add Webhook.
- Pick a platform: Slack, Discord, Microsoft Teams, n8n, or Generic (HMAC-signed JSON).
- Paste the webhook URL from the platform's admin panel:
- Slack: Apps → Incoming Webhooks → Add to Workspace → copy URL
- Discord: Server Settings → Integrations → Webhooks → New Webhook → copy URL
- Teams: Connector → Incoming Webhook → copy URL
- n8n: HTTP Trigger node → copy URL
- Generic: any HTTPS endpoint (will receive HMAC-signed payloads)
- Tick the events you want to subscribe to:
scan_complete,vulnerability_found,va_scan_complete,va_vulnerability_found,va_scan_failed,test. - Click Test to send a synthetic message to the webhook URL.
- If the test arrives, click Save.
Once saved, every matching event in your tenant fires a delivery to the webhook. Outbound deliveries use the platform's SSRF guard, are HMAC-signed for non-platform-specific webhooks, and respect a 10-second timeout. Failed deliveries are recorded in the delivery history.
Step 6 — Check billing and usage
Open Settings → Billing. The page shows:
- Current plan and renewal date
- Monthly usage for VA scans, AI tokens, members, storage
- Quota progress bars per metric
- Plan upgrade and downgrade options
- Invoice history with download links
If usage is approaching a quota, the bar turns yellow. If it's at the cap, scans/operations that would exceed it are refused with a clear error message in the relevant tool.
Step 7 — Enforce MFA across the tenant
Open Settings → MFA.
For your own account, the page shows your current MFA status and an Enable MFA button. Walk through the QR code setup and save your backup codes.
For tenant-wide enforcement (Owners only):
- Toggle Require MFA for all members.
- Choose a grace period (e.g. 7 days) so existing members have time to set up MFA before being locked out.
- Save.
After the grace period, any member without MFA enrolled cannot sign in until they enroll.
Tips and best practices
- Owner is special — protect it. The Owner role can delete the tenant. Never share Owner credentials. Use a custom Admin role for day-to-day administration.
- Use custom roles for least privilege. A junior analyst probably doesn't need
tenant.manage. Create aJunior Analystrole with onlyviewpermissions and the specificrunpermissions they need. - Save API keys to a secrets manager immediately. The full key is shown once. There is no recovery flow.
- Rotate API keys quarterly. Even if you don't suspect a leak, regular rotation limits the blast radius if a key is exposed.
- Test webhooks before saving. The Test button on each integration fires a synthetic event. Use it.
- Enable MFA enforcement on day one. It's easier to onboard new members into an MFA-required tenant than to retrofit MFA after a year of no enforcement.
- Watch the audit log. Every administrative action — member changes, role edits, API key creation, integration changes — is recorded with user, IP, and timestamp. Review it monthly.
Privacy
All settings data is tenant-scoped. Members from other tenants cannot see your organization, your roles, your API keys, or your integrations. API keys are stored as SHA-256 hashes — the full key never touches the database. Integration credentials (webhook signing secrets, GitHub OAuth tokens, Cloudflare API tokens) are Fernet-encrypted at rest and only decrypted in the worker that needs them. Hard-deleting the tenant deletes everything including audit logs.
Related
Try XHack AI Now
Experience the full power of XHack directly in your browser. No installation required.
Launch XHack AI